Castlevania Symphony of the Night
I - Life Max Up
1) From the bottom right Save Room in Main Castle’s Alchemy Laboratory, just head 2 rooms left. You’ll end up in a vertical area with a breakable floor in the middle portion. Break it and enter the next room, which has an apparatus in the bottom mid. Smash the green container on the table to obtain 2 Life Max Up.
2) From the top Save Room in Main Castle’s Underground Caverns, head 2 rooms left, down and right. You’ll end up in huge vertical area full of Bone Archers and Spear Guards. Now head to the middle exit and go up by jumping on the cabinet. Above, the Life Max Up is in the top left portion of the room.
3) In the waterfall area in Main Castle’s Underground Caverns, head to the bottom right of that place. There is a passage behind the waterfall that leads to a hidden cavern, where the Life Max Up is located.
4) From the waterfall area in Main Castle’s Underground Caverns, head bottom left, another left, up and 2 more rooms to the left. You’ll end up in a place which is now part of the Entrance. The Life Max Up is on the platform just next to the mechanical switch and movable wall.
5) From the top right Save Room in Main Castle’s Royal Chapel, just head 7 rooms left. The Life Max Up is on the topmost left platform, which is the attic of the tall tower.
6) From the bottom Save Room in Main Castle’s Outer Wall, head right, top right and 2 more rooms to the right. You’ll end up in the area where the elevator is located. Just below the elevator is a platform with an urn. Break the urn to obtain the Life Max Up.
7) In the clock tower in Main Castle’s Marble Gallery, head up and left. You’ll end up in a small room with no enemies around. The life Max Up is in the middle of that room.

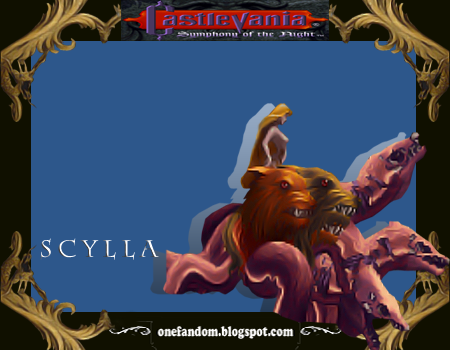
8) From the Save Room in Castle Keep of the Main Castle, just head 2 rooms left. You’ll end up in a huge open-air area which leads to Dracula’s throne room. Transform into Bat and fly above the top rightmost portion. Enter the next room to obtain the Life Max Up.
9) From the Save Room in Castle Keep of the Main Castle, head left, bottom right and 4 more rooms right. You’ll end up in a vertical room in Clock Tower which is full of Medusa Heads and Harpies. At the topmost right corner of that place is a breakable wall that leads to another room. Break the wall and head inside, then go up to building’s attic to obtain a Life Max Up and a Heart Max Up.
10) From the right Save Room in Main Castle’s Entrance, just head right. Let Alucard transform into Bat to access the middle right passage above. The Life Max Up is on the pedestal in the next room.
11) From the drawbridge or gate in Main Castle’s Entrance, transform into Bat or leap using the Gravity Boots special skill (Down, Up + Jump) to access the small chamber above and obtain the Life Max Up.
12) From the bottom Save Room in Main Castle’s Underground Caverns, just head outside. You’ll end up in a very long shaft all the way up. At the bottommost right portion of that place is a breakable floor that leads to a hidden underground cavern. Smash it and delve deeper below, then head directly to the right. If you already have the Holy Symbol relic, which enables you to breathe underwater, then head to the bottom left underwater area (close to the middle) to obtain the Life Max Up.
13) From the bottom Save Room in Main Castle’s Underground Caverns, just head 2 rooms to the left. The Life Max Up is on the bottom leftmost underwater area.
14) From the bottom Save Room in Main Castle’s Underground Caverns, just head 3 rooms to the left. There is a Life Max Up and a Heart Max Up below the wooden bridge, which is close to the entrance. To break that bridge, you must lure the Skeleton Ape closer to it and let the monster throw the fiery barrel. Make sure that the barrel hits the bridge to obtain those 2 items. If you missed the target, just go back and forth inside that area and do the same thing all over again.
15) From the right Save Room in Main Castle’s Catacombs, head right, bottom right, another right, bottom left and another left. You’ll end up in an empty place with Life Max Up and Heart Max Up in the middle.
16) From the entrance in Main Castle’s Long Library, just head 6 rooms left. You’ll end up in an area just below the Librarian’s shop. Let Alucard stand just directly below the small opening above the ceiling and perform the Gravity Boots’ special skill (Down, Up + Jump). Alucard will hit the Librarian’s chair above and obtain a Life Max Up.
17) From the Save Room below the clock tower in Main Castle’s Marble Gallery, just head 2 rooms to the right. You’ll find a Life Max Up and Heart Max Up in the last room you’ve entered in.
18) From Dracula’s throne room in Inverted Castle’s Reverse Keep, just head a little left and you’ll find an opening on the floor. Go deeper below until you reach a treasure room full of urns and statues. Break the second urn to the left to obtain the Life Max Up. Then break the first urn and first statue to the right to obtain 2 more Life Max Ups.
19) From the Save Room in Inverted Castle’s Reverse Keep, head right, top left and left. You’ll end up in Darkwing Bat’s (boss) room in Reverse Clock Tower, defeat him and enter another 3 rooms to the left. You’ll end up in a clockwork tower full of Cloaked Knights. There is a breakable wall in the bottom leftmost corner of that place. Smash the wall, enter the next room and head down to obtain a Life Max Up.
20) From the top Save Room in Inverted Castle’s Reverse Outer Wall, head left, top left, 2 rooms left and up. Break the urn on the bottom left ledge to obtain a Life Max Up.
21) The next one is in Inverted Castle’s Black Marble Gallery. From the clock tower in Black Marble’s Gallery, just head down to the middle opening on the floor and head right to obtain the Life Max Up.

22) From the Save Room in Inverted Castle’s Dark Wing’s Lair, head right and top right. The Life Max Up is in the middle of that area.
23) There is another Life Max Up in Inverted Castle’s Anti-Chapel. From the bottom left Save Room, head 7 rooms directly to the right. You’ll end up in a huge tower full of Balloon Pods, Imps and Snipers of Goth. Break the urn on the bottom right ledge of that tower to obtain a Life Max Up.
24) From the right Save Room in Inverted Castle’s Necromancy Laboratory, head top left, bottom left and bottom right. Inside, smash the brown orb to obtain a Life Max Up.
25) From the left Save Room in Inverted Castle’s Reverse Entrance, head left, top left and up. You’ll end up in an open-air area with no enemies around. Head to the mid right passage and enter the next room to obtain the Life Max Up.
26) From the top Save Room in Inverted Castle’s Reverse Caverns, just head 2 areas to the right. You’ll end up in a wide cavern with areas submerged in water. Head to the top right submerged area to obtain a Potion and a Life Max Up.
27) From the bottom Save Room in Inverted Castle’s Reverse Caverns, head 3 areas to the right to obtain a Life Max Up.
28) From the left Save Room in Inverted Castle’s Floating Catacombs, head left, top left, left, top right and right. There is a Life Max Up and a Heart Max Up in the last area you’ve entered in.
29) From the right Save Room in Inverted Castle’s Floating Catacombs, just head 3 areas to the right. You’ll end up in Galamoth (boss) room. Defeat it and go to the next room above to obtain a Life Max Up and Heart Max Up.
30) From the left Save Room in Inverted Castle’s Reverse Colosseum, just head outside. Go directly to the passage in front to obtain 2 Heart Max Ups and a Life Max Up.
31) Defeat all the bosses in the Main Castle and Inverted Castle except Medusa, the Creature, Darkwing Bat, Akmodan II and Death to obtain Life Max Up for each battle.
II - Heart Max Up
1) From the right Save Room in Main Castle’s Entrance, just head right and bottom left. You’ll end up in an area blocked by a wooden wall, in which switch is on the other. Thus, you need to go to the other side just to unlock it. It can only be done when you already reached the Scorpion Warp Room in the Outer Wall, which teleports you to the Horse Warp Room in the Entrance.
The Heart Max Up is in between the mechanical switch and the wooden wall.
2) From the bottom right Save Room in in Main Castle’s Alchemy Laboratory, just head 2 rooms left. You’ll end up in a vertical area with a breakable wall in the bottom left. Break it and enter the next room. Inside, break the orb on the table to obtain the Heart Max Up.
3) From the top Save Room in in Main Castle’s Outer Wall, head right and two rooms down. You’ll end up in a huge area full of Medusa Heads and where you can find the switch to the elevator. Beside that switch is an urn, break it to obtain the Heart Max Up.
4) From the top Save Room in in Main Castle’s Underground Caverns, just head 3 rooms left. The Heart Max Up is on a platform in the middle of the room.
5) In the clock tower in Main Castle’s Marble Gallery, use the clock sub-weapon skill to open the hidden passage at the top right corner. Go up and head right to get the Heart Max Up and Alucart Shield.
6) From the right Save Room in Main Castle’s Colosseum, head left and bottom right. Go to the farthest right corner of that area to get the Heart Max Up.
7) From the Save Room in Castle Keep of the Main Castle, head left, bottom right and 4 more rooms to the right. You’ll end up in a vertical room in Clock Tower, which full of Medusa Heads and Harpies. At the topmost right corner is a breakable wall that leads to another room. Break the wall and head inside, then go up to building’s attic to obtain the Heart Max Up.
8) From the Save Room in Castle Keep of the Main Castle, just head 2 rooms left. You’ll end up in a huge open-air area which leads to Dracula’s throne room. Transform into Bat and fly above the top rightmost portion. Enter the next room to obtain 2 Heart Max Ups
9) From the Save Room in Castle Keep of the Main Castle, just head 2 rooms left. You’ll end up in a huge open-air area with broken stairs. Transform into Bat and fly to the other side, which is the room next to Dracula’s throne room. Head to the middle of a long table and break the urn to uncover the Heart Max Up.
10) From the right Save Room in in Main Castle’s Entrance, just head right and bottom right. You’ll end up in an open-air area with a broken platform. Jump on the broken portion of that platform, aiming to the leftmost corner below. Just make a double jump or transform into Bat to access the middle left room. The Heart Max Up is on a pedestal inside the room.
11) From the Save Room in in Main Castle’s Olrox’s Quarters, head left and bottom left. You’ll end up in an area full of Bloody Zombies. Head deeper inside, until you reach the middle portion to obtain the Heart Max Up.
12) From the bottom Save Room in in Main Castle’s Underground Caverns, just head 3 rooms to the left. There is a Life Max Up and Heart Max Up below the wooden bridge, which is close to the entrance. To break that bridge, you must lure the Skeleton Ape closer to it and let the monster throw the fiery barrel. Make sure the barrel hits the bridge to obtain the items. If you missed the target, just go back and forth inside that area and do the same thing all over again.
13) From the right Save Room in in Main Castle’s Catacombs, head right, bottom right, another right, bottom left and another left. You’ll end up in an empty place with Life Max Up and Heart Max Up in the middle.
14) From the right Save Room in in Main Castle’s Catacombs, head right, bottom right, another right, bottom left and 4 more areas directly to the left. You’ll end up in an area with some urns but guarded by a Discus Lord. Break the urn on the top ledge to obtain the Heart Max Up.
15) From the Save Room below the clock tower in Main Castle’s Marble Gallery, just head 2 rooms to the right. You’ll find a Life Max Up and Heart Max Up in the last room you’ve entered in.
16) From Dracula’s throne room in Inverted Castle’s Reverse Keep, just head a little left and you’ll find an opening on the floor. Go deeper below until you reach a treasure room full of urns and statues. Break the first urn and first statue to the left to obtain 2 Heart Max Ups. Then break the second urn to the right to obtain another one.
17) From the Save Room in Inverted Castle’s Reverse Keep, head right, top left and left. You’ll end up in Darkwing Bat’s (boss) room in Reverse Clock Tower, defeat him and enter another 3 rooms to the left. You’ll end up in a clockwork tower full of Cloaked Knights. There is a breakable wall in the bottom leftmost corner, smash it and enter the next room. Inside, go down and enter another room below to obtain a Heart Max Up and Life Max Up.
18) From the top Save Room in Inverted Castle’s Reverse Outer Wall, head left, top left, 2 rooms left and 2 rooms up. You’ll end up in a huge area full of Nova Skeletons and some Stone Skulls. Head to the top mid platform to obtain a Heart Max Up.

19) The next one is in Inverted Castle’s Black Marble Gallery. From the clock tower in Black Marble’s Gallery, just head down to the middle opening on the floor and head left to obtain the Heart Max Up.
20) From the Save Room in Inverted Castle’s Dark Wing’s Lair, head right, bottom right and right. You’ll end up in Akmodan II’s (boss) room. Defeat him and proceed to the next room to obtain the Heart Up.
21) From the top right Save Room in Inverted Castle’s Anti-Chapel, head left and down. You’ll end up in an area full of Imps, Snipers of Goth and some Archers. Also, the whole place is full of urns that contain treasures. From above, smash the second urn below to obtain a Up.
22) Just before you enter the top right Save Room in Inverted Castle’s Anti-Chapel, you’ll find a Heart Max Up on a ledge.
23) From the top left Save Room in Inverted Castle’s Necromancy Laboratory, head 2 rooms to the right. You’ll end up in a room guarded by some Salem Witches and Gremlins. The topmost right wall of that place is breakable, smash it and enter the hidden room. Inside, break the brown orb to obtain a Heart Max Up.
24) From the top Save Room in Inverted Castle’s Reverse Caverns, just head 2 areas to the right. You’ll end up in a wide cavern with areas submerged in water. Head to the top left submerged area to obtain a Heart Max Up.
25) From the bottom Save Room in Inverted Castle’s Reverse Caverns, head right, mid left and another left. Break the urn in the leftmost corner to obtain a Heart Max Up.
26) From the left Save Room in Inverted Castle’s Floating Catacombs, head left, top left, left, top right and right. There is a Life Max Up and a Heart Max Up in the middle of the last area you have entered in.
27) From the right Save Room in Inverted Castle’s Floating Catacombs, just head 3 areas to the right. You’ll end up in Galamoth (boss) room. Defeat it and go to the next room above to obtain a Life Max Up and Heart Max Up.