Fire Emblem Series

Fire Emblem

Fire Emblem Logo

FAQs and Guides

Character Promotion Guide

Character Promotion Guide
Fire Emblem


Characters can go to a higher class after they reached level 10 or above. The maximum level that a single character class can reach is level 20. When a character is already in its max level, he cannot improve his stats nor his experience any further. This is when promotion item comes handy.

I - Hero Crest

1) Fighter to Warrior - Dorcas, Bartre, Geitz

2) Mercernary to Hero - Raven, Harken

3) Myrmidons to Swordmaster - Guy, Karel, Karla

Fire Emblem


II - Knight Crest

4) Cavaliers to Paladin - Sain, Kent, Marcus, Lowen, Isadora

5) Knights to General - Wallace, Oswin


III - Orion’s Bolt

6) Archer to Sniper - Wil, Rebecca, Louise

7) Nomad to Nomadic Trooper - Rath

Fire Emblem


IV - Guiding Ring

8) Cleric to Sage - Serra

9) Monk to Sage - Lucius, Renault

10) Mage to Sage - Erk, Pent, Nino

11) Shaman to Druid - Canas

12) Troubadour to Valkyrie - Priscilla

Fire Emblem


V - Elysian Whip

13) Pegasus Knight to Falcoknight - Florina, Fiora, Farina

14) Wyvern Rider to Wyvern Lord - Heath, Vaida


VI - Fell Contract

15) Thief to Assassin - Matthew, Legault, Jaffar


VII - Ocean Seal

16) Pirate to Berserker - Dart, Hawkeye

Fire Emblem


VIII - Heaven Seal

17) Lord to Blade Lord - Lyn

18) Lord to Knight Lord - Eliwood

19) Lord to Great Lord - Hector


IX - Earth Seal

20) Promotes all classes except for Thief, Pirate and Lord.

Fire Emblem


X - Unique Classes

21) Bard - Nils

22) Dancer - Ninian

23) Transporter - Merlinus

24) Archsage - Athos

Librarian’s Shop Inventory Guide

Librarian’s Shop Inventory Guide
Castlevania Symphony of the Night


I - Medicines

1) Potion
Restores some HP.

Buy: $800
Effects: Replenishes 50 HP.


2) High Potion
Restores about half HP.

Buy: $2000
Effects: Although the game description says it restores about half of the HP, yet it only replenishes 100 HP.


3) Elixir
Restores all HP.

Buy: $8000
Effects: Replenishes all HP.


4) Manna Prism
Restores all MP.

Buy: $4000
Effects: Replenishes all MP.


5) Antivenom
Cures poisoning.

Buy: $200
Effects: Nullifies poison status.


6) Uncurse
Removes curse.

Buy: $200
Effects: Nullifies curse status.


7) Hammer
Unpetrify (Familiar use only).

Buy: $200
Effects: Faerie familiar uses the Hammer to smash the stone that covers Alucard every time he is petrified.


8) Library Card
Enchanted library card.

Buy: $500
Effects: Teleports Alucard back to the Main Castle’s Long Library, specifically just outside the Librarian’s shop.


II - Throw 2

9) Magic Missile
Shoots a magic arrow.

Buy: $300
Stats: ATT +30


10) Bwaka Knife
Bwaka throwing knife.

Buy: $400
Stats: ATT +30

Castlevania Symphony of the Night


11) Boomerang
Anti-aerial weapon.

Buy: $500
Stats: ATT +30


12) Javelin
Throwing spear.

Buy: $800
Stats: ATT +50


13) Fire Boomerang
Flaming boomerang.

Buy: $1000
Stats: ATT +50


14) Shuriken
Japanese throwing star.

Buy: $2400
Stats: ATT +50


15) Cross Shuriken
Powerful throwing star.

Buy: $5000
Stats: ATT +41


16) Buffalo Star
Razor-sharp master star.

Buy: $8000
Stats: ATT +61


17) Flame Star
Flaming throwing star.

Buy: $15000
Stats: ATT +71


III - Food

18) Meal Ticket
Mystery food ticket.

Buy: $2000
Effects: Randomly generates food that can be stock in your inventory.


IV - Weapons

19) Saber
Light Cavalry sword.

Buy: $1500
Stats: ATT +9


20) Mace
Iron cudgel.

Buy: $2000
Stats: ATT +9

Castlevania Symphony of the Night


21) Damascus Sword.
Fine sword honed to razor-edge.

Buy: $4000
Stats: ATT +17


22) Firebrand
Fire Sword of Oberon.

Buy: $10000
Stats: ATT +25


23) Icebrand
Ice Sword of Mim.

Buy: $10000
Stats: ATT +25


24) Thunderbrand
Lightning sword of Indra.

Buy: $10000
Stats: ATT +25


25) Harper
The sword named Harper.

Buy: $12000
Stats: ATT +28


V - Shields

26) Leather Shield
Leather shield - low DEF.

Buy: $400
Stats: DEF +1


27) Iron Shield
Hard iron shield.

Buy: $3980
Stats: DEF +2


VI - Headgears

28) Velvet Hat
Velvet hat.

Buy: $400
Stats: DEF +1, INT +2


29) Leather Hat
Tanned leather hat.

Buy: $1000
Stats: DEF +2


30) Circlet
Circlet.

Buy: $4000
Stats: INT +5

Castlevania Symphony of the Night


31) Silver Crown
Increases intelligence.

Buy: $12000
Stats: INT +12


VII - Armors

32) Iron Cuirass
Iron cuirass.

Buy: $1500
Stats: DEF +4


33) Steel Cuirass
Steel cuirass.

Buy: $4000
Stats: DEF +5


34) Diamond Plate
Diamond breastplate.

Buy: $12000
Stats: DEF +15


VIII - Cloaks

35) Reverse Cloak
Dual colored reversible cape.

Buy: $2000
Stats: DEF +1, CON +3


36) Elven Cloak
Perfect for forest camouflage.

Buy: $3000
Stats: DEF +2, CON +5


37) Joseph's Cloak
Select color.

Buy: $30000
Stats: DEF +3, CON +9


IX - Accessories

38) Medal
ATT+1 DEF+1.

Buy: $3000
Stats: ATT +1, DEF +1


39) Ring Of Pales
Ring with holy powers.

Buy: $4000
Stats: ATT +1, DEF +1, STR +1, CON +1, INT +1, LCK +1


40) Gauntlet
ATT+5.

Buy: $8000
Stats: ATT +5

Castlevania Symphony of the Night


41) Duplicator
Duplicates consumable items.

Buy: $500000
Effects: Infinitely duplicates consumable items such as throwing weapons, bombs, medicines and foods.


X - Salable Jewels

42) Zircon
Sparkling ring.

Sell: $150


43) Aquamarine
Fairly valuable ring.

Sell: $800


44) Turquoise
Fairly valuable ring.

Sell: $1500


45) Onyx
Valuable ring.

Sell: $3000


46) Garnet
Valuable ring.

Sell: $5000


47) Opal
Valuable ring.

Sell: $8000


48) Diamond
Highly valuable ring.

Sell: $20000

Enemy List (3 of 3)

Enemy List
Castlevania Symphony of the Night


101) Balloon Pod
Holds countless poison seeds.

Level: 29
Hit Points: 3
Strong Versus: None
Immune: None
Weak Versus: None
Absorb: None
Drop Items: None
Experience: 88
Location: Reverse Cavern, Anti-Chapel


102) Yorick
Skeleton eternally chasing his own skull.

Level: 29
Hit Points: 10
Strong Versus: None
Immune: None
Weak Versus: None
Absorb: None
Drop Items: Monster Vial 3, Skull Shield
Experience: 300
Location: Reverse Keep


103) Bomb Knight
Bomb-tossing armored knight.

Level: 30
Hit Points: 46
Strong Versus: None
Immune: None
Weak Versus: None
Absorb: None
Drop Items: TNT, Dynamite
Experience: 140
Location: Reverse Clock Tower


104) Flying Zombie
Zombies which attack even when cut in half.

Level: 32
Hit Points: 190
Strong Versus: None
Immune: None
Weak Versus: Holy, Fire
Absorb: None
Drop Items: Shuriken, Frankfurter
Experience: 50
Location: Dark Wing’s Lair


105) Bitterfly
Mutated Insect. Visible only to magicians.

Level: 33
Hit Points: 4
Strong Versus: None
Immune: None
Weak Versus: None
Absorb: None
Drop Items: Luck Potion, Mystic Pendant
Experience: 120
Location: Necromancy Laboratory


106) Jack O'Bones
Expert at throwing weapons.

Level: 33
Hit Points: 20
Strong Versus: None
Immune: None
Weak Versus: Holy
Absorb: None
Drop Items: Shuriken, Flame Star
Experience: 150
Location: Reverse Entrance, Reverse Cavern, Black Marble Gallery, Reverse Outer Wall,


107) Archer
Fiendishly accurate archer.

Level: 34
Hit Points: 300
Strong Versus: None
Immune: None
Weak Versus: None
Absorb: None
Drop Items: Heart Refresh, Vorpal Blade
Experience: 140
Location: Anti-Chapel


108) Werewolf
Half-man, half-wolf.

Level: 34
Hit Points: 280
Strong Versus: None
Immune: None
Weak Versus: None
Absorb: None
Drop Items: Iron Fist, Yasutsuna
Experience: 200
Location: Reverse Colosseum


109) Black Panther
Liquid creature. Takes black panther shape.

Level: 35
Hit Points: 35
Strong Versus: None
Immune: None
Weak Versus: Fire
Absorb: None
Drop Items: Meal Ticket, Masamune
Experience: 600
Location: Anti-Chapel


110) Darkwing Bat
Giant vampire bat.

Level: 35
Hit Points: 600
Strong Versus: None
Immune: None
Weak Versus: None
Absorb: None
Drop Items: None
Experience: 1200
Location: Reverse Clock Tower

Castlevania Symphony of the Night


111) Dragon Rider
White dragon ridden by Flea Man.

Level: 35
Hit Points: 120
Strong Versus: None
Immune: None
Weak Versus: None
Absorb: None
Drop Items: None
Experience: 150
Location: Reverse Entrance


112) Minotaur
Half-man, half-bull.

Level: 35
Hit Points: 320
Strong Versus: None
Immune: None
Weak Versus: None
Absorb: None
Drop Items: Sirloin, Fury Plate
Experience: 250
Location: Colosseum


113) Nova Skeleton
Wields fearsome beam weapon.

Level: 35
Hit Points: 20
Strong Versus: None
Immune: None
Weak Versus: None
Absorb: None
Drop Items: Monster Vial 3, Terminus Est
Experience: 444
Location: Reverse Entrance, Reverse Cavern, Reverse Outer Wall, Black Marble Gallery


114) Orobourous
Wyrm controlled by Flea Man.

Level: 35
Hit Points: 200
Strong Versus: None
Immune: None
Weak Versus: None
Absorb: None
Drop Items: Karma Coin, Lapis Lazuli
Experience: 150
Location: Reverse Entrance


115) White Dragon
Animated skeleton of huge dragon.

Level: 35
Hit Points: 260
Strong Versus: Fire
Immune: None
Weak Versus: Holy
Absorb: None
Drop Items: None
Experience: 150
Location: Reverse Colosseum


116) Fire Warg
Fireball-spitting wolf.

Level: 36
Hit Points: 200
Strong Versus: None
Immune: Fire
Weak Versus: Ice
Absorb: None
Drop Items: Turquoise, Karma Coin
Experience: 160
Location: Reverse Entrance


117) Rock Knight
Rock-tossing armored knight.

Level: 36
Hit Points: 160
Strong Versus: None
Immune: None
Weak Versus: None
Absorb: None
Drop Items: Jewel Knuckles, Platinum Mail
Experience: 250
Location: Reverse Cavern


118) Sniper of Goth
Angel archer. Slew Amalaric of the Goths.

Level: 36
Hit Points: 50
Strong Versus: Holy
Immune: None
Weak Versus: Dark
Absorb: None
Drop Items: Magic Missile, Brilliant Mail
Experience: 200
Location: Royal Chapel, Anti-Chapel


119) Spectral Sword
Evil demon-sword. Causes poltergeist phenomena.

Level: 36
Hit Points: 540
Strong Versus: None
Immune: None
Weak Versus: None
Absorb: None
Drop Items: Gurthang, Mablung Sword
Experience: 400
Location: Anti-Chapel


120) Ghost Dancer
Skeleton with leaping attack.

Level: 37
Hit Points: 30
Strong Versus: None
Immune: None
Weak Versus: Holy
Absorb: None
Drop Items: Buffalo Star, Stone Mask
Experience: 160
Location: Death Wing’s Lair

Castlevania Symphony of the Night


121) Warg Rider
Skeleton mounted on Warg.

Level: 37
Hit Points: 120
Strong Versus: Cut
Immune: Fire
Weak Versus: Ice
Absorb: None
Drop Items: None
Experience: 160
Location: Reverse Entrance


122) Cave Troll
Pre-intelligent bloodsucker with long tongue for sucking.

Level: 38
Hit Points: 88
Strong Versus: Water
Immune: None
Weak Versus: Fire
Absorb: None
Drop Items: Neutron Bomb, Nauglamir
Experience: 333
Location: Reverse Caverns


123) Dark Octopus
Evil mutated octopus.

Level: 38
Hit Points: 280
Strong Versus: Water
Immune: None
Weak Versus: Fire, Thunder
Absorb: None
Drop Items: Sushi, Green Tea
Experience: 120
Location: Reverse Cavern


124) Fire Demon
Flame demon.

Level: 38
Hit Points: 320
Strong Versus: None
Immune: Fire
Weak Versus: None
Absorb: None
Drop Items: Fire Shield, Marsil Sword
Experience: 666
Location: Necromancy Laboratory


125) Gorgon
Armor plated war-beast.

Level: 38
Hit Points: 240
Strong Versus: Fire, Stone, Cut, Hit
Immune: None
Weak Versus: None
Absorb: None
Drop Items: Hammer, Stone Sword
Experience: 555
Location: Black Marble Gallery


126) Malachi
Gruesome demon from Hell.

Level: 39
Hit Points: 450
Strong Versus: None
Immune: None
Weak Versus: Holy
Absorb: Dark
Drop Items: Dark Shield, Dark Armor
Experience: 666
Location: Death Wing’s Lair


127) Akmodan II
Ancient Egyptian mummy.

Level: 40
Hit Points: 1200
Strong Versus: None
Immune: Stone, Poison, Curse
Weak Versus: Holy, Fire
Absorb: Dark
Drop Items: None
Experience: 2500
Location: Death Wing’s Lair


128) Blue Venus Weed
Advanced Venus Weed. Fed with demon blood.

Level: 40
Hit Points: 100
Strong Versus: Hit
Immune: None
Weak Versus: Fire
Absorb: None
Drop Items: Zwei Hander, Heart Refresh
Experience: 1000
Location: Reverse Entrance, Reverse Cavern


129) Doppleganger40
Shape-shifting demon.

Level: 40
Hit Points: 777
Strong Versus: None
Immune: None
Weak Versus: None
Absorb: None
Drop Items: None
Experience: 2001
Location: Reverse Cavern


130) Medusa
Snake-headed demoness with gaze of stone.

Level: 40
Hit Points: 1100
Strong Versus: Hit
Immune: None
Weak Versus: None
Absorb: Stone
Drop Items: None
Experience: 2500
Location: Anti-Chapel

Castlevania Symphony of the Night


131) The Creature
Made from the body parts of powerful warriors.

Level: 40
Hit Points: 1100
Strong Versus: None
Immune: Thunder
Weak Versus: None
Absorb: None
Drop Items: None
Experience: 2500
Location: Reverse Outer Wall


132) Fake Grant
Zombie impersonating Grant.

Level: 41
Hit Points: 800
Strong Versus: None
Immune: None
Weak Versus: None
Absorb: None
Drop Items: None
Experience: 1200
Location: Reverse Colosseum


133) Fake Trevor
Zombie impersonating Trevor.

Level: 41
Hit Points: 1200
Strong Versus: None
Immune: None
Weak Versus: None
Absorb: None
Drop Items: None
Experience: 1000
Location: Reverse Colosseum


134) Imp
Mischievous little demon.

Level: 41
Hit Points: 43
Strong Versus: None
Immune: None
Weak Versus: None
Absorb: None
Drop Items: Luck Potion, King's Stone
Experience: 66
Location: Anti-Chapel, Reverse Cavern, Necromancy Laboratory


135) Fake Sypha
Zombie impersonating Sypha.

Level: 42
Hit Points: 1000
Strong Versus: None
Immune: None
Weak Versus: None
Absorb: None
Drop Items: None
Experience: 1500
Location: Reverse Colosseum


136) Beezelbub
Beezelbub, Lord of Flies.

Level: 44
Hit Points: 2000
Strong Versus: None
Immune: None
Weak Versus: Holy
Absorb: Dark
Drop Items: None
Experience: 4444
Location: Necromancy Laboratory


137) Azaghal
Executioner of Hell.

Level: 45
Hit Points: 330
Strong Versus: Dark, Hit
Immune: None
Weak Versus: None
Absorb: None
Drop Items: Covenant Stone, Mourne Blade
Experience: 700
Location: Death Wing’s Lair, Reverse Colosseum


138) Frozen Half
New-half ice spirit. Servant of Galamoth.

Level: 45
Hit Points: 118
Strong Versus: Water
Immune: None
Weak Versus: Fire
Absorb: Ice
Drop Items: Necklace of J, Opal Circlet
Experience: 600
Location: Floating Catacombs


139) Salome
Young female witch.

Level: 45
Hit Points: 210
Strong Versus: None
Immune: None
Weak Versus: None
Absorb: None
Drop Items: Wizard Hat, Manna Prism
Experience: 450
Location: Floating Catacombs


140) Richter Belmont
Master vampire hunter.

Level: 48
Hit Points: 400
Strong Versus: None
Immune: Holy, Stone
Weak Versus: Dark
Absorb: None
Drop Items: None
Experience: None
Location: Castle Keep

Castlevania Symphony of the Night


141) Dodo Bird
Rare bird. Runs when sees people.

Level: 49
Hit Points: 2
Strong Versus: None
Immune: None
Weak Versus: None
Absorb: None
Drop Items: Heart Broach, Runesword
Experience: 111
Location: Reverse Entrance


142) Galamoth
Magical being with plan to rule the netherworld.

Level: 50
Hit Points: 5000
Strong Versus: None
Immune: None
Weak Versus: None
Absorb: None
Drop Items: None
Experience: 9999
Location: Floating Catacombs


143) Guardian
High level Armor Lord.

Level: 60
Hit Points: 500
Strong Versus: Cut
Immune: Fire, Thunder, Ice
Weak Versus: None
Absorb: Dark
Drop Items: Great Sword, God's Garb
Experience: 1500
Location: Black Marble Gallery


144) Death
Dracula's close friend.

Level: 66
Hit Points: 888
Strong Versus: None
Immune: None
Weak Versus: Holy
Absorb: Dark
Drop Items: None
Experience: 4444
Location: Cave


145) Shaft
Dark Priest of Dracula.

Level: 88
Hit Points: 1300
Strong Versus: None
Immune: Poison
Weak Versus: None
Absorb: None
Drop Items: None
Experience: None
Location: Black Marble Gallery


146) Dracula
Lord of Wallachia. Father of Alucard.

Level: 98
Hit Points: 9999
Strong Versus: Fire, Thunder
Immune: Poison
Weak Versus: None
Absorb: Dark
Drop Items: None
Experience: None
Location: Black Marble Gallery


Previous | 1 | 2 | 3 | Next

Enemy List (2 of 3)

Enemy List
Castlevania Symphony of the Night


51) Skull Lord
Giant skull spirit.

Level: 12
Hit Points: 80
Strong Versus: Dark
Immune: None
Weak Versus: Holy
Absorb: None
Drop Items: Scimitar, Skull Shield
Experience: 50
Location: Clock Tower, Reverse Keep


52) Black Crow
Flesh-eating raven.

Level: 13
Hit Points: 15
Strong Versus: Thunder
Immune: None
Weak Versus: None
Absorb: None
Drop Items: Aquamarine, Red Bean Bun
Experience: 50
Location: Royal Chapel


53) Blue Raven
Spirit of long-dead blue raven.

Level: 13
Hit Points: 15
Strong Versus: Thunder
Immune: None
Weak Versus: None
Absorb: None
Drop Items: Zircon, Pork Bun
Experience: 50
Location: Royal Chapel


54) Corpseweed
Plant with razor-sharp leaves.

Level: 13
Hit Points: 18
Strong Versus: Hit
Immune: None
Weak Versus: Fire
Absorb: None
Drop Items: Antivenom, Potion
Experience: 100
Location: Long Library, Abandoned Mines, Black Marble Gallery, Cave


55) Flail Guard
Skeleton equipped with spiked iron flail.

Level: 13
Hit Points: 36
Strong Versus: None
Immune: None
Weak Versus: Holy
Absorb: None
Drop Items: Morningstar, Pot Roast
Experience: 50
Location: Clock Tower


56) Flea Rider
Flea Man riding on specially trained war-goose.

Level: 13
Hit Points: 17
Strong Versus: None
Immune: None
Weak Versus: None
Absorb: None
Drop Items: Turkey, Ham and Eggs
Experience: 50
Location: Castle Keep


57) Spectral Sword
Evil demon-sword. Causes poltergeist phenomena.

Level: 13
Hit Points: 90
Strong Versus: None
Immune: None
Weak Versus: None
Absorb: None
Drop Items: Broadsword, Bastard Sword
Experience: 80
Location: Olrox’s Quarters


58) Bone Halberd
Naginata-wielding demon.

Level: 14
Hit Points: 30
Strong Versus: None
Immune: None
Weak Versus: Holy
Absorb: None
Drop Items: Javelin, Ham and Eggs
Experience: 40
Location: Royal Chapel


59) Scylla
Mythological sea monster.

Level: 14
Hit Points: 200
Strong Versus: None
Immune: None
Weak Versus: Thunder
Absorb: Water
Drop Items: None
Experience: 500
Location: Underground Cavern


60) Hunting Girl
Invisible huntress spirit.

Level: 15
Hit Points: 88
Strong Versus: Holy, Hit
Immune: None
Weak Versus: None
Absorb: None
Drop Items: Were Bane, Cheesecake
Experience: 70
Location: Royal Chapel, Colosseum

Castlevania Symphony of the Night


61) Mudman
Animated mud golem.

Level: 15
Hit Points: 15
Strong Versus: None
Immune: None
Weak Versus: None
Absorb: None
Drop Items: None
Experience: 50
Location: Long Library


62) Owl Knight
Heavily armored knight. Attacks with trained owl.

Level: 15
Hit Points: 180
Strong Versus: Cut
Immune: None
Weak Versus: None
Absorb: None
Drop Items: Cutlass, Medal
Experience: 50
Location: Entrance, Colosseum


63) Spectral Sword
Evil demon-sword. Causes poltergeist phenomena.

Level: 15
Hit Points: 100
Strong Versus: None
Immune: None
Weak Versus: None
Absorb: None
Drop Items: Broadsword, Bastard Sword
Experience: 100
Location: Royal Chapel


64) Vandal Sword
Sword Lord wields sword even when banished.

Level: 15
Hit Points: 120
Strong Versus: Hit
Immune: None
Weak Versus: None
Absorb: None
Drop Items: Holy Sword, Muramasa
Experience: 100
Location: Clock Tower


65) Flea Armor
Flea Man armed with axe and shield.

Level: 16
Hit Points: 18
Strong Versus: None
Immune: None
Weak Versus: None
Absorb: None
Drop Items: High Potion, Iron Cuirass
Experience: 40
Location: Long Library, Clock Tower


66) Hippogryph
Part horse, lion and eagle.

Level: 16
Hit Points: 800
Strong Versus: Thunder
Immune: None
Weak Versus: None
Absorb: None
Drop Items: None
Experience: 800
Location: Royal Chapel


67) Paranthropus
Giant skeleton.

Level: 16
Hit Points: 100
Strong Versus: None
Immune: None
Weak Versus: Holy
Absorb: None
Drop Items: Gauntlet, Ring of Varda
Experience: 50
Location: Colosseum, Reverse Outer Wall


68) Slime
Monster made from gel.

Level: 16
Hit Points: 32
Strong Versus: None
Immune: Cut
Weak Versus: Fire
Absorb: None
Drop Items: None
Experience: 50
Location: Catacombs


69) Blade Master
Master of twin-bladed combat.

Level: 17
Hit Points: 65
Strong Versus: None
Immune: None
Weak Versus: None
Absorb: None
Drop Items: Shotel, Cross Shuriken
Experience: 80
Location: Colosseum


70) Wereskeleton
Were panther skeleton.

Level: 17
Hit Points: 33
Strong Versus: None
Immune: None
Weak Versus: Holy
Absorb: None
Drop Items: Str. Potion, Garnet
Experience: 50
Location: Catacombs

Castlevania Symphony of the Night


71) Grave Keeper
Grave Keeper. Master of unarmed combat.

Level: 18
Hit Points: 123
Strong Versus: None
Immune: None
Weak Versus: Fire, Thunder, Ice
Absorb: None
Drop Items: Miso Soup, Natou
Experience: 60
Location: Colosseum, Catacombs


72) Gremlin
Pyromaniacal gremlin.

Level: 18
Hit Points: 100
Strong Versus: Fire
Immune: None
Weak Versus: Ice
Absorb: None
Drop Items: Resist Fire, Fire Mail
Experience: 60
Location: Abandoned Mines, Catacombs, Necromancy Laboratory


73) Harpy
Creature with head of woman and body of bird.

Level: 18
Hit Points: 26
Strong Versus: Thunder
Immune: None
Weak Versus: None
Absorb: None
Drop Items: Apple, Life Apple
Experience: 70
Location: Clock Tower


74) Minotaurus
Bull-headed monster.

Level: 18
Hit Points: 300
Strong Versus: None
Immune: None
Weak Versus: None
Absorb: None
Drop Items: None
Experience: 400
Location: Colosseum, Reverse Colosseum


75) Werewolf
Shape-shifting lycanthrope.

Level: 18
Hit Points: 260
Strong Versus: None
Immune: None
Weak Versus: None
Absorb: None
Drop Items: None
Experience: 300
Location: Colosseum, Reverse Colosseum


76) Bone Ark
Portable skull shrine carried by skeleton priests.

Level: 19
Hit Points: 250
Strong Versus: None
Immune: None
Weak Versus: Holy, Fire
Absorb: None
Drop Items: Monster Vial 3, Skull Shield
Experience: 40
Locations: Catacombs


77) Valhalla Knight
Bloodthirsty undead knight who eternally seeks combat.

Level: 19
Hit Points: 161
Strong Versus: None
Immune: None
Weak Versus: Holy
Absorb: None
Drop Items: Estoc, Claymore
Experience: 100
Location: Colosseum, Reverse Clock Tower


78) Cloaked Knight
Mysterious cloaked swordsman.

Level: 20
Hit Points: 65
Strong Versus: None
Immune: None
Weak Versus: None
Absorb: None
Drop Items: Flamberge, Heaven Sword
Experience: 80
Location: Clock Tower, Reverse Clock Tower


79) Fishhead
Fish head guardian.

Level: 20
Hit Points: 70
Strong Versus: Fire
Immune: None
Weak Versus: Holy
Absorb: None
Drop Items: Resist Ice, Icebrand
Experience: 50
Location: Underground Caverns


80) Lesser Demon
Short magic-wielding demon. Summons demonic allies.

Level: 20
Hit Points: 400
Strong Versus: None
Immune: Dark
Weak Versus: Holy
Absorb: None
Drop Items: Obsidian Sword, Holbein Dagger
Experience: 100
Location: Long Library, Necromancy Laboratory

Castlevania Symphony of the Night


81) Lossoth
Searches among graves and knows much wise lore.

Level: 20
Hit Points: 99
Strong Versus: None
Immune: None
Weak Versus: None
Absorb: None
Drop Items: Sirloin, Firebrand
Experience: 50
Location: Catacombs


82) Salem Witch
Ghost witches from Salem.

Level: 20
Hit Points: 180
Strong Versus: None
Immune: None
Weak Versus: None
Absorb: None
Drop Items: Gold Circlet, Shortcake
Experience: 80
Location: Abandoned Mines, Necromancy Laboratory


83) Blade
Eldest Giant brother. Wields two huge daggers.

Level: 21
Hit Points: 380
Strong Versus: None
Immune: None
Weak Versus: None
Absorb: None
Drop Items: Hunter Sword, Gold Plate
Experience: 100
Location: Entrance, Olrox’s Quarters, Black Marble Gallery


84) Gurkha
Giant brother. Wields a gurkha knife.

Level: 21
Hit Points: 420
Strong Versus: None
Immune: None
Weak Versus: None
Absorb: None
Drop Items: Combat Knife, Gold Plate
Experience: 120
Location: Entrance, Black Marble Gallery


85) Hammer
Giant brother. Uses huge steel hammer.

Level: 21
Hit Points: 250
Strong Versus: None
Immune: None
Weak Versus: None
Absorb: None
Drop Items: Hammer, Gold Plate
Experience: 110
Location: Olrox’s Quarters


86) Discus Lord
Discus-wielding armored knight.

Level: 22
Hit Points: 450
Strong Versus: None
Immune: None
Weak Versus: None
Absorb: None
Drop Items: Chakram, Jewel Sword
Experience: 140
Location: Catacombs


87) Karasuman
Demon Lord of Ravens.

Level: 22
Hit Points: 500
Strong Versus: Dark
Immune: None
Weak Versus: None
Absorb: None
Drop Items: Resist Dark, Ring of Feanor
Experience: 1000
Location: Clock Tower


88) Large Slime
Monster created from slimy gel substance.

Level: 22
Hit Points: 64
Strong Versus: None
Immune: Cut
Weak Versus: Fire
Absorb: None
Drop Items: None
Experience: 100
Location: Catacombs


89) Hellfire Beast
Thunder-wielding demon. Called "Musician from Hell."

Level: 23
Hit Points: 380
Strong Versus: None
Immune: None
Weak Versus: None
Absorb: None
Drop Items: Lightning Mail, Fire Mail
Experience: 150
Location: Catacombs


90) Cerberus
Watchdog of Hell.

Level: 24
Hit Points: 800
Strong Versus: None
Immune: None
Weak Versus: Ice
Absorb: Fire
Drop Items: None
Experience: 1500
Location: Abandoned Mines

Castlevania Symphony of the Night


91) Killer Fish
Master Fish-head.

Level: 25
Hit Points: 120
Strong Versus: Fire, Water
Immune: None
Weak Versus: Thunder
Absorb: None
Drop Items:
Aquamarine
Sushi
Experience: 100
Location: Underground Caverns, Reverse Cavern


92) Olrox
Magic-wielding vampire. Rules upper part of castle.

Level: 25
Hit Points: 666
Strong Versus: Dark
Immune: None
Weak Versus: None
Absorb: None
Drop Items: None
Experience: 500
Location: Olrox’s Quarters


93) Succubus
Female demon. Invades men's dreams.

Level: 25
Hit Points: 666
Strong Versus: Dark
Immune: None
Weak Versus: None
Absorb: None
Drop Items: None
Experience: 2000
Location: Nightmare


94) Tombstone
Gravestones possessed by evil spirits of dead.

Level: 25
Hit Points: 5
Strong Versus: Cut
Immune: Stone
Weak Versus: Hit
Absorb: None
Drop Items: Katana, Green Tea
Experience: 88
Location: Anti-Chapel


95) Venus Weed
Watered with human blood.

Level: 25
Hit Points: 100
Strong Versus: Hit
Immune: None
Weak Versus: Fire
Absorb: None
Drop Items: Coral Circlet, Heart Refresh
Experience: 150
Location: Abandoned Mines


96) Lion
The cowardly lion.

Level: 27
Hit Points: 150
Strong Versus: None
Immune: None
Weak Versus: None
Absorb: None
Drop Items: Gauntlet, Fist of Tulkas
Experience: 1000
Location: Reverse Library


97) Scarecrow
Impaled man looking for brain.

Level: 27
Hit Points: 120
Strong Versus: None
Immune: None
Weak Versus: None
Absorb: None
Drop Items: Javelin, Muramasa
Experience: 1000
Location: Reverse Library


98) Granfaloon
Nightmarish creature. Composed of many.

Level: 28
Hit Points: 400
Strong Versus: Dark
Immune: None
Weak Versus: Holy
Absorb: None
Drop Items: None
Experience: 3000
Location: Catacombs


99) Schmoo
Monster nicknamed "schmoo."

Level: 28
Hit Points: 50
Strong Versus: None
Immune: None
Weak Versus:
Holy, Fire
Absorb: None
Drop Items: Ramen, Crissaegrim
Experience: 1000
Location: Reverse Library

Castlevania Symphony of the Night


100) Tin Man
Heartless tin man.

Level: 28
Hit Points: 48
Strong Versus: Cut
Immune: None
Weak Versus: None
Absorb: None
Drop Items: Lunch A, Mojo Mail
Experience: 1000
Location: Reverse Library


Previous | 1 | 2 | 3 | Next

Enemy List (1 of 3)

Enemy List
Castlevania Symphony of the Night


1) Dracula
Destroyed by Richter in 1792 (5 years ago).

Level: N/A
Hit Points: 600
Strong Versus: None
Immune: None
Weak Versus: None
Absorb: None
Drop Items: None
Experience: None


2) Blood Skeleton
Revives due to blood soaked bones.

Level: 0
Hit Points: 9
Strong Versus: None
Immune: None
Weak Versus: None
Absorb: None
Drop Items: None
Experience: None
Location: Catacombs, Floating Catacombs


3) Bat
Vampire bats. Feared as servants of evil.

Level: 1
Hit Points: 1
Strong Versus: None
Immune: None
Weak Versus: None
Absorb: None
Drop Items: Potion, Monster Vial 2
Experience: 10
Location: Entrance, Underground Caverns, Royal Chapel, Cave, Floating Catacombs


4) Stone Skull
Indestructible spinning skull.

Level: 1
Hit Points: ????
Strong Versus: None
Immune: None
Weak Versus: None
Absorb: None
Drop Items: None
Experience: None
Location: Black Marble Gallery, Reverse Outer Wall, Reverse Colosseum


5) Zombie
Fresh Corpses. Magically animated.

Level: 1
Hit Points: 1
Strong Versus: None
Immune: None
Weak Versus: Holy, Fire
Absorb: None
Drop Items: $100, Cloth Tunic
Experience: 5
Location: Entrance


6) Merman
Legendary "creature". Attacks all invaders.

Level: 2
Hit Points: 10
Strong Versus: Water
Immune: None
Weak Versus: Fire, Thunder
Absorb: None
Drop Items: Zircon, Monster Vial 1
Experience: 12
Location: Entrance


7) Skeleton
Magically animated skeleton.

Level: 2
Hit Points: 9
Strong Versus: None
Immune: None
Weak Versus: Holy
Absorb: None
Drop Items: Shield Potion, Monster Vial 3
Experience: 10
Location: Alchemy Laboratory, Marble Gallery, Outer Wall, Floating Catacombs


8) Warg
Wolves which guard castle entrance.

Level: 2
Hit Points: 21
Strong Versus: None
Immune: None
Weak Versus: Fire
Absorb: None
Drop Items: None
Experience: 10
Location: Entrance


9) Bone Scimitar
Ferocious skeleton swordsman.

Level: 3
Hit Points: 18
Strong Versus: None
Immune: None
Weak Versus: None
Absorb: None
Drop Items: Short Sword, Red Rust
Experience: 15
Location: Entrance, Alchemy Laboratory, Colosseum


10) Merman
Fireball-spitting Merman. Largest of merman kind.

Level: 3
Hit Points: 10
Strong Versus: Water
Immune: None
Weak Versus: Fire, Thunder
Absorb: None
Drop Items: Zircon, Monster Vial 1
Experience: 12
Location: Entrance

Castlevania Symphony of the Night


11) Spittle Bone
Four-legged skeleton. Drips poison.

Level: 3
Hit Points: 18
Strong Versus: None
Immune: None
Weak Versus: Holy
Absorb: None
Drop Items: None
Experience: 20
Location: Alchemy Laboratory


12) Axe Knight
Low level axe knight.

Level: 4
Hit Points: 32
Strong Versus: None
Immune: None
Weak Versus: Hit
Absorb: None
Drop Items: Axe, Bronze Cuirass
Experience: 10
Location: Alchemy Laboratory, Marble Gallery


13) Bloody Zombie
Eastern Church soldiers dispatched 300 years ago.

Level: 4
Hit Points: 24
Strong Versus: None
Immune: None
Weak Versus: Holy, Fire
Absorb: None
Drop Items: Cloth Tunic, Basilard
Experience: 15
Location: Entrance, Alchemy Laboratory, Olrox’s Quarters


14) Slinger
Bone-hurling skeleton.

Level: 4
Hit Points: 12
Strong Versus: None
Immune: None
Weak Versus: Holy
Absorb: None
Drop Items: Leather Shield, Knight Shield
Experience: 10
Location: Marble Gallery


15) Ouija Table
Possessed Ouija table.

Level: 5
Hit Points: 20
Strong Versus: None
Immune: None
Weak Versus: None
Absorb: None
Drop Items: Barley Tea, Morning Set
Experience: 20
Location: Marble Gallery


16) Skelerang
Boomerang wielding skeleton.

Level: 5
Hit Points: 18
Strong Versus: None
Immune: None
Weak Versus: Holy
Absorb: None
Drop Items: Boomerang, Fire Boomerang
Experience: 15
Location: Marble Gallery, Royal Chapel


17) Thornweed
Plant with razor-sharp leaves.

Level: 5
Hit Points: 12
Strong Versus: Hit
Immune: None
Weak Versus: Fire
Absorb: None
Drop Items: Grapes, Strawberry
Experience: 20
Location: Long Library, Abandoned Mines, Black Marble Gallery, Cave


18) Gaibon
Fire-breathing flying demon.

Level: 6
Hit Points: 200
Strong Versus: None
Immune: None
Weak Versus: None
Absorb: None
Drop Items: None
Experience: 200
Location: Alchemy Laboratory, Cave


19) Ghost
Low level flaming ghosts.

Level: 6
Hit Points: 11
Strong Versus: Dark
Immune: None
Weak Versus: Holy
Absorb: None
Drop Items: $400, Antivenom
Experience: 10
Location: Marble Gallery


20) Marionette
Demonic puppet from Hell.

Level: 6
Hit Points: 20
Strong Versus: None
Immune: None
Weak Versus: Fire
Absorb: None
Drop Items: Smart Potion, Circlet
Experience: 30
Location: Marble Gallery

Castlevania Symphony of the Night


21) Slogra
Demon with enchanted spear.

Level: 6
Hit Points: 200
Strong Versus: None
Immune: None
Weak Versus: None
Absorb: None
Drop Items: None
Experience: 200
Location: Alchemy Laboratory, Cave


22) Diplocephalus
Nauseating two-headed beast. Which is the head?

Level: 7
Hit Points: 80
Strong Versus: Water
Immune: None
Weak Versus: Holy, Fire
Drop Items: Pentagram, Tart
Experience: 50
Location: Marble Gallery


23) Flea Man
Strange human-like creature.

Level: 7
Hit Points: 11
Strong Versus: None
Immune: None
Weak Versus: None
Absorb: None
Drop Items:Takemitsu, Cheese
Experience: 17
Location: Marble Gallery, Long Library, Clock Tower


24) Medusa Head
From Medusa's hair.

Level: 7
Hit Points: 12
Strong Versus: None
Immune: Stone
Weak Versus: None
Absorb: None
Drop Items: Resist Stone, Medusa Shield
Experience: 20
Location: Outer Wall, Clock Tower, Dark Wing’s Lair, Black Marble Gallery


25) Blade Soldier
Novice of twin-bladed combat.

Level: 8
Hit Points: 16
Strong Versus: None
Immune: None
Weak Versus: None
Absorb: None
Drop Items: $400, Namakura
Experience: 20
Location: Colosseum


26) Bone Musket
Skeletons equipped with rifles.

Level: 8
Hit Points: 24
Strong Versus: None
Immune: None
Weak Versus: Holy
Absorb: None
Drop Items: Magic Missile, Talisman
Experience: 20
Location: Outer Wall, Colosseum


27) Medusa Head
From Medusa's Hair. Can petrify.

Level: 8
Hit Points: 12
Strong Versus: None
Immune: None
Weak Versus: None
Absorb: Stone
Drop Items: Resist Stone, Medusa Shield
Experience: 30
Location: Outer Wall, Reverse Clock Tower, Dark Wing’s Lair, Black Marble Gallery


28) Plate Lord
Heavily armored knight with iron ball.

Level: 8
Hit Points: 90
Strong Versus: None
Immune: None
Weak Versus: None
Absorb: None
Drop Items: Iron Ball, Neutron Bomb
Experience: 90
Location: Marble Gallery, Colosseum


29) Stone Rose
Mutated plant. Seeds petrify.

Level: 8
Hit Points: 60
Strong Versus: Water
Immune: None
Weak Versus: Cut
Absorb: Dark
Drop Items: Leather Shield, Meal Ticket
Experience: 60
Location: Marble Gallery


30) Axe Knight
Well armored axe knight.

Level: 9
Hit Points: 42
Strong Versus: None
Immune: None
Weak Versus: None
Absorb: None
Drop Items: Axe, Axelord Shield
Experience: 50
Location: Outer Wall, Castle Keep, Colosseum

Castlevania Symphony of the Night


31) Ctulhu
Fire and ice demon. Seems reluctant to fight.

Level: 9
Hit Points: 200
Strong Versus: Dark
Immune: None
Weak Versus: Holy
Absorb: None
Drop Items: Pentagram, Bat Pentagram
Experience: 100
Location: Marble Gallery, Dark Wing’s Lair, Necromancy Laboratory


32) Bone Archer
Skeleton archer equipped with bow.

Level: 10
Hit Points: 10
Strong Versus: None
Immune: None
Weak Versus: None
Absorb: None
Drop Items: $400, Magic Missile
Experience: 50
Location: Outer Wall, Underground Caverns


33) Bone Pillar
Cannon built of white dragon skulls.

Level: 10
Hit Points: 64
Strong Versus: None
Immune: None
Weak Versus: Holy
Absorb: None
Drop Items: Antivenom, Ballroom Mask
Experience: 30
Location: Royal Chapel


34) Doppleganger10
Shape-shifting demon.

Level: 10
Hit Points: 120
Strong Versus: None
Immune: None
Weak Versus: None
Absorb: None
Drop Items: None
Experience: 500
Location: Outer Wall


35) Owl
Local barnyard owl. Mutated by castle's influence.

Level: 10
Hit Points: 26
Strong Versus: None
Immune: None
Weak Versus: Fire
Absorb: None
Drop Items: None
Experience: 30
Location: Entrance, Colosseum


36) Phantom Skull
Executed soldier's head. Hunting for vengeance.

Level: 10
Hit Points: 15
Strong Versus: Dark
Immune: None
Weak Versus: Holy
Absorb: None
Drop Items: Felt Hat, Resist Dark
Experience: 30
Location: Clock Tower


37) Scylla Worm
Snake living off Scylla.

Level: 10
Hit Points: 130
Strong Versus: None
Immune: Water
Weak Versus: Thunder
Absorb: None
Drop Items: None
Experience: 100
Location: Underground Caverns


38) Skeleton Ape
Animated ape skeleton. Hurls wooden barrels.

Level: 10
Hit Points: 10
Strong Versus: None
Immune: None
Weak Versus: Holy
Absorb: None
Drop Items: Banana, TNT
Experience: 30
Location: Outer Wall, Underground Caverns


39) Spear Guard
Armored warrior with naginata.

Level: 10
Hit Points: 20
Strong Versus: None
Immune: None
Weak Versus: Holy
Absorb: None
Drop Items: Javelin, Iron Cuirass
Experience: 70
Location: Outer Wall, Underground Caverns


40) Spellbook
Book of beginner's spells.

Level: 10
Hit Points: 26
Strong Versus: Hit
Immune: None
Weak Versus: Fire
Absorb: None
Drop Items: $1000, Pentagram
Experience: 30
Location: Long Library

Castlevania Symphony of the Night


41) Winged Guard
Slow-flying skeleton warrior.

Level: 10
Hit Points: 15
Strong Versus: None
Immune: None
Weak Versus: None
Absorb: None
Drop Items: Iron Shield, Javelin
Experience: 30
Location: Royal Chapel


42) Ectoplasm
Physical manifestation of bodiless tormented souls.

Level: 11
Hit Points: 18
Strong Versus: Cut
Immune: None
Weak Versus: Holy, Fire
Absorb: None
Drop Items: Uncurse, Manna Prism
Experience: 70
Location: Long Library


43) Sword Lord
Knight armed with a Greatsword.

Level: 11
Hit Points: 61
Strong Versus: None
Immune: None
Weak Versus: None
Absorb: None
Drop Items: Cutlass, Bekatowa
Experience: 80
Location: Outer Wall, Clock Tower


44) Toad
Toad magically enlarged by demonic baptism.

Level: 11
Hit Points: 10
Strong Versus: Water
Immune: None
Weak Versus: Fire, Thunder
Absorb: None
Drop Items: Blue Knuckles, Pizza
Experience: 20
Location: Underground Caverns


45) Armor Lord
Heavily armored undead warrior.

Level: 12
Hit Points: 84
Strong Versus: Cut
Immune: None
Weak Versus: None
Absorb: None
Drop Items: Rapier, Saber
Experience: 100
Location: Outer Wall, Colosseum


46) Corner Guard
Armored guard. Strong in perilous areas.

Level: 12
Hit Points: 48
Strong Versus: None
Immune: None
Weak Versus: None
Absorb: None
Drop Items:Cutlass, Damascus Sword
Experience: 30
Location: Royal Chapel


47) Dhuron
Headless skeleton. Wields a rapier.

Level: 12
Hit Points: 32
Strong Versus: None
Immune: None
Weak Versus: Holy
Absorb: None
Drop Items: Hide Cuirass, Rapier
Experience: 50
Location: Long Library


48) Frog
Cave-dwelling frog.

Level: 12
Hit Points: 2
Strong Versus: Water
Immune: None
Weak Versus: Fire, Thunder
Absorb: None
Drop Items: Knuckle Duster, Pizza
Experience: 20
Location: Underground Caverns


49) Frozen Shade
Ice-wielding female spirit.

Level: 12
Hit Points: 16
Strong Versus: None
Immune: Water
Weak Versus: Fire
Absorb: Ice
Drop Items: Ice Mail, Ice Cream
Experience: 40
Location: Underground Caverns

Castlevania Symphony of the Night


50) Magic Tome
Book of ancient weapons.

Level: 12
Hit Points: 22
Strong Versus: Hit
Immune: None
Weak Versus: Fire
Absorb: None
Drop Items: $2000, Saber
Experience: 35
Location: Long Library


Previous | 1 | 2 | 3 | Next

Castlevania Symphony of the Night Avatar Collection

Castlevania Symphony of the Night Avatar Collection

I have been an avid fan of Konami games since I played Suikoden 2 in the late 90s. After beating the game and fell in love with the story, yet another Konami title captured my interest. Like Suikoden 2 before it, Castlevania Symphony of the Night is definitely one of my favorite games of all time and the driving force that led me to play other Castlevania titles. It is still top in my list, even though a lot has change in the gaming world for the past decade. I guess it’s the story that makes this game very compelling and the endearing characters too.

All avatars are original arts from Castlevania Symphony of the Night. All are in a standard size of 150 x 150.


Image Linking Guide:

Strictly no direct linking. You can save these images on Picasa, Flickr, Photobucket or any photo sharing site, which automatically generate links for you.


Image Distribution Guide:

Those who want to copy and add these images on their own website, blog, wiki or forum, we have just one rule: please add a link of this page to your own webpage where you are going to put these avatars. It doesn’t necessarily mean that you have to link this site on your affiliates or in every page of your site though.

For those who want to use a single image as avatar are not covered on this rule.

Alucard

Castlevania Symphony of the Night


Maria Renard

Castlevania Symphony of the Night


Richter Belmont

Castlevania Symphony of the Night Castlevania Symphony of the Night


Librarian

Castlevania Symphony of the Night


Ferryman

Castlevania Symphony of the Night


Lisa

Castlevania Symphony of the Night


Succubus

Castlevania Symphony of the Night


Death

Castlevania Symphony of the Night


Shaft

Castlevania Symphony of the Night


Dracula

Castlevania Symphony of the Night

Spells or Special Move List

Spells or Special Move List
Castlevania Symphony of the Night


1) Summon Spirit
Summons a fierce spirit.

Left, Right, Up, Down and Square.

MP Cost: 5
Effects: Summon a spirit that damages enemies it passes through.

Requirements: N/A


2) Wing Smash
Powerful attack by Bat.

Hold X, Up, Up-Left, Left, Down-Left, Down, Down-Right, Right and then release X.

MP Cost: 8
Effects: The Bat smashes an enemy in front and knocks it back.

Requirements: Alucard must be in Bat form.


3) Wolf Charge
Powerful attack by Wolf.

Press Down, Down-Right, Right and Square.

MP Cost: 10
Effects: The Wolf charges and bites an enemy in front with lightning speed.

Requirements: Alucard must be in Wolf form and already have the Skill of the Wolf relic.

Castlevania Symphony of the Night


4) Dark Metamorphosis
Heal HP by shedding blood.

Press Left, Up-Left, Up, Up-Right, Right and Square.

MP Cost: 10
Effects: Alucard replenishes his HP every time he sheds blood of an enemy. Doesn’t works on enemies that don’t have blood like Skeletons or Ghost.

Requirements: N/A


5) Hellfire
Transport and fireball attack.

Press Up, Down, Down-Right, Right and Square.

MP Cost: 15
Effects: Alucard vanishes and teleports in any direction you choose by pressing the left or right buttons. After he shows up again, he’ll shoots 3 fireballs in front.

Requirements: N/A


6) Soul Steal
Steals HP from nearby enemies.

Press Left, Right, Down-Right, Down, Down-Left, Left, Right and Square.

MP Cost: 50
Effects: Alucard conjures a spell that steals HP from enemies and candelabra while replenishing his HP.

Requirements: N/A

Castlevania Symphony of the Night


7) Tetra Spirit
Summons 4 spirits.

Hold Up button for 2 seconds, then press Up-Right, Right, Down-Right, Down and Square.

MP Cost: 20
Effects: Summons 4 spirits that damage enemies they passes through.

Requirements: N/A


8) Sword Brothers
Summons Sword Brothers.

Press Down, Down-Right, Right, Up-Right and hold Up for 2 seconds, then press Down and Square.

MP Cost: 30
Effects: The Sword familiar will fly above Alucard and unleash an explosion that damages enemies nearby.

Requirements: Alucard must summon the Sword familiar before performing this skill.

Super Mario RPG Cheats and Secrets

Cheats and Secrets
Super Mario RPG Legend of the Seven Stars

Unlocking Attack Scarf

Go to Monstro Town and talk to Chow. He will tell you about Mario’s Super Jump skill. Mario learned his famous Super Jump after he reached level 6. This is a special attack wherein Mario bumps on the head of an enemy and deals decent damage when timed perfectly. Use the Super Jump 30 times and head back to Chow in Monstro Town. The guy will give you an Attack Scarf.

Another Attack Scarf can be obtained after beating the mini-game in Booster’s Tower where Mario needs to hide in curtains. Finish the game without being caught to obtain the item.


Unlocking the Super Suit

Just like getting the Attack Scarf, go to Monstro Town and talk to Chow. He will tell you about Mario’s Super Jump skill. Mario learned his famous Super Jump after he reached level 6. This is a special attack wherein Mario bumps on the head of an enemy and deals decent damage when timed perfectly. Use the Super Jump 100 times and head back to Chow in Monstro Town. The guy will give you the Super Suit.


Play Game Boy

After defeating Yaridovich in Seaside Town, head back to Mushroom Kingdom and enter the inn. Approach to the kid who is playing a Game Boy and keep on talking to him until he wins the game. He will then offer you to buy the Game Boy for 500 coins. Buy it and enjoy the action shooting game.

Photobucket


Obtaining the Lazy Shell 

In Monstro Town, talk to the Rat Funk you met earlier on your way to the town. This triggers a new path in Rose Town that leads to the gardener’s house, but do not go there yet until you acquired the prerequisite items.

First, beat Megaslimax in Land’s End to obtain the “Seed.” After that, head to Nimbus Land and beat Valentina. Then head to the eastern edge of the town where an invisible pathway leads to Shy Away, which will give you the “Fertilizer.” After acquiring these two essential items it’s now time to go to Rose Town.

In Rose Town, just follow the new path and talk to the gardener. He will plant the Seed and use the Fertilizer, which eventually turns it into a huge beanstalk. Climb the stalk and get the Lazy Shell in a treasure chest above.


Mallow’s Ultimate Weapon

In Bowser’s Keep, there is a room where you need to pass through 4 out of 6 courses, in which each has its own course number posted on doors. Head to “Door 6” and beat the game  to obtain the Sonic Cymbal.


Geno’s Ultimate Weapon

In Bowser’s Keep, there is a room where you need to pass through 4 out of 6 courses, in which each has its own course number posted on doors. Head to “Door 2” and beat the game to obtain the Star Gun.


Bowser’s Ultimate Weapon

In Bowser’s Keep, there is a room where you need to pass through 4 out of 6 courses, in which each has its own course number posted on doors. Head to “Door 3” and beat the game to obtain the Drill Claw.


Princess Toadstool’s Ultimate Weapon

This weapon can only be purchased once, so better be careful when buying this stuff. After beating the Axem Rangers outside the Barrel Volcano, head to Moleville. Go to the item shop and the shopkeeper (blue Toad) will offer you rarities. When he offers you item no. 1 and no. 2, just say no. Instead, buy the item no. 3 which is the “Metal Plate”. This item is nonetheless, the Frying Pan itself and it cost you 300 coins.

Photobucket


Culex Side Quest

In Monstro Town, there is a sealed door just next to Goomba’s shop. To open it, you must first acquire the Shiny Stone. First, head to Moleville and buy some “Fireworks” from an inventor mole. Then talk to the little mole near a pile of crates and trade the Fireworks for a Shiny Stone. After this, head back to Monstro Town and equip your party with the strongest weapons and armors available. Rest and save the game in the inn before unsealing the door.

Culex is a tough opponent and definitely not to be taken lightly. He’s probably the hardest boss to beat in the game. Even tougher than the final boss Smithy. After defeating him, he’ll give you the Quartz Gem as a trophy.


Belome’s Treasure 

In Monstro Town, talk to the Thwomp inside the second house from the entrance. He will stomp the floor every time you talk to him. Keep on doing this and check outside if the key on a cliff falls down, if not get back to the guy and do the same thing all over again. Now get the key when it falls and head to the exit of the town.

Go to Belome’s Temple and enter the room where your fortune is told by scrolls. When you’re fortune reads "Sorry, I'm not accepting any visitors past my bedtime," then proceed to the next room. You’ll end up in Belome’s treasure room! Give to Belome the key and he’ll let the party pass through. The room is full of Frog Coins, Flowers and some valuable items.


10 Frog Coins  

From Nimbus Land, head to the secret area that leads to a shortcut in Kero Sewers. Inside the sewers, jump upon the platform just lower left of the pipe. Then, jump once more to hit the treasure chest that contains the “Cricket Jam.” Now, exit Kero Sewers and make your way to Tadpole Pond.

Cricket is Frogfucius’ favorite food and he’ll reward handsomely those who deliver to him some of Cricket delicacies. Go directly to Frogfucius while in Tadpole Pond and he’ll give you 10 Frog Coins in exchange for this very rare item.

Photobucket


Quick Money Trick 

Go to the Forest of Maze and delve deeper until you’re in the place where there are seven stumps. As you have noticed, the Wigglers come in and out the stumps. Now, wait near one of those stumps and jump on the Wiggler’s “head” when it passes near you. Doing this will give you 10 coins and a Frog Coin when you’ve done 10 jumps. Just do the same method all over again to gain more.


Unlimited Frog Coins

Frog Coin is valuable but very rare, however, there’s a trick that can suffice the need of this money. First, head to Land’s End after you defeated Valentina in Nimbus Land. Look for a Shogun (ant-like creature) that pops up in the quicksand. This trick requires timing and precision, it may take a while before you can master this but the reward worth it all. Just before the Shogun is about to pop up jump on him 3 times. Every successful attempt will give you 20 Coins and a Frog Coin. Do the same method all over again to gain more


More Frog Coins

In Land’s End, where Mario have to scale the cliff, beat the time trial mini-game of Sgt. Flutter and receive random rewards from him. Be warned, this mini-game is tough but not that hard to beat once you familiarize the whole gameplay. The items and coins received varies, depending on how fast you scale the cliff. If you’re fast enough, Sgt. Flutter will give you 1 to 5 Frog Coins, lots of coins or any valuable items.


Alto Card 

After talking to Frogfucius in Tadpole Pond, go back to the Toad bridge and then head right. You’ll meet a Tadpole that will share the Frogfucius’ Suite #18. After which, head to Melody Bay where Toadofsky makes his composition. Just follow this note: So, La, Mi, Re, Do, Re, Do and Re.

When successfully performed the guy will give you the Alto Card as a token of appreciation. Use it to buy special items from the Juice Bar in Tadpole Pond.

Photobucket


Tenor Card 

Go to Moleville’s Coal Mines and talk to the moles where you used the Bambino Bombs earlier in the game. One of them will tell you about the Moleville Blue composition. Now, head to Melody Bay in Tadpole Pond and perform it in front of Toadofsky. Just follow this note: Mi, Do, So, Do, Re, La, Ti and Do.

When successfully performed the guy will give you the Tenor Card as a token of appreciation. Use it to buy special items from the Juice Bar in Tadpole Pond.


Soprano Card

Talk to Starslap in Monstro Town to learn the Star Lullaby. Then head to Melody Bay in Tadpole Pond and perform the melody in front Toadofsky. Just follow this note: La, Ti, Do, Re, So, Do, Re, and Mi.

When successfully performed the guy will give you the Soprano Card as a token of appreciation. Use it to buy special items from the Juice Bar in Tadpole Pond.


Access Grate Guy’s Casino

To gain access in Grate Guy’s Casino you must have first the Bright Card. Head to Booster’s Tower and look for Knife Guy. Talk to him and he’ll let you play a guessing game.

Knife Guy will juggle purple balls with one yellow ball. The main goal is to guess in which hands the yellow ball landed. Beat the game 13 times and Knife Guy will reward you with Bright Card.

Now head to Bean Valley, where you can find a Shy Away watering some Smilax in the pipe. Defeat the Smilax and check down the pipes, until you find the underground area where you encounter lots of Geckos and a Gold Chomp. Go to the left portion of the place, just beside the Gold Chomp and jump 3 times. A notable sound will ring that triggers a platform leading to the exit.

Grate Guy’s Casino is now open for business but better be careful not to waste your money. You need a lot of luck to play the Casino games if you don’t want your hard earned Frog Coins come to nothing.


3 Musty Fears Quest

In Monstro Town, head to the house just next to the item shop where you can sleep for free. Inside, take a nap in the bed and 3 ghastly creatures will appear in Mario’s dream. They call themselves the 3 Musty Fears, which consists of Greaper, Dry Bones and Big Boo. They’ll let you play a game wherein you need to collect 3 flags that are hidden around the world. After a short scene, you can now start looking for those hidden items.

Greapers flag can be found in Rose Town’s welcome signpost. Located just in front of the town’s entrance. Read the signpost to obtain it. Dry Bones flag, on the other hand, is in Mario’s bed in Mario’s Pad. Go inside the Pipehouse and check the bed to obtain it. Lastly, Big Boo’s flag is found in Mushroom Derby’s race track in Yo’ster Isle. Stand in between the “O” and “A” on the GOAL area and search the place to obtain it.

After acquiring all 3 flags, it’s time to go back in Monstro Town. Once again, take a nap on the same bed and the 3 Musty Fears will show themselves. They’ll give you a reward for completing their quest. When Mario wakes up, he’ll be wearing the Ghost Medal. The item can be sold for staggering 800 coins.

Photobucket


Rose Town and Forest of Maze’s Treasures

In Rose Town, talk to the guy who walking back and forth near the cliff. He’ll ask you a favor to unlock the stairs, in which switch is inside his house above the cliff. Let Mario jump over his head and then jump once more to reach the top. Then head inside the house and hit the 2 treasures. After which, you have to go up the stairs that leads to the second floor and jump on the green switch. Then go outside the house and talk to the guy you’ve met earlier. He’ll ask you about what happened to his treasures. Just tell him the truth and he’ll reveal to you a secret about the treasures in Forest of Maze.

Go to the Forest of Maze until you reach the area where there are 4 paths. Just follow this order to uncover the hidden treasure area: left, left, straight and right. Remember this is not about your (player) left or right but Mario’s. In whatever direction Mario faces when he arrives in that certain area, make a turn according to Mario’s left or right.

When successfully performed the following instructions, you’ll end up in an area where you can find a stump. Go inside that stump and you’ll find yourself in an underground full of valuable treasures.


Link’s Cameo Scene

After beating the Forest of Maze’s quest, spend a night at the inn in Rose Town. In the next morning, you’ll find Link from Legend of Zelda series sleeping on another bed, just next to Mario. Talk to him while in deep sleep and a notable sound from Zelda games will be heard.


Samus Cameo Scene

After beating Yaridovich in Seaside Town and obtained the 5th Star, make a long trip back to Mushroom Kingdom. Go to the Palace’s guest room and you’ll find Samus Aran from Metroid games sleeping on the bed. Talk to her and she tells you the reason why she is resting.


Samus Doll

After defeating the events in Marrymore, go back to Booster’s Tower. Head directly to the top of the tower where you played the “Hide in the Curtains” mini-game. There is a Samus doll in the basket.

Photobucket


Bellhop Mario

If you spent many nights in Marrymore inn, the innkeeper will force Mario to become a bellhop in order to pay all his debts. The old bellhop will guard the door to make sure Mario can’t leave. Whenever a customer comes in you lead them to their room upstairs. Don’t just leave the room until you talk to them, some of the customers will give you some tip. You must do the same thing all over again until you can finally pay all your debts.


Acquiring Jinx’s Belt

In Monstro Town, head to the house in the cliff. The place is actually a dojo of a martial arts master, Jinx. Inside, you will first meet Jagger, a member of Bowser’s Koopa Troopa and currently a disciple of Jinx. A short scene will then takes place followed by a friendly battle. After that, Jinx will show himself and challenge Mario’s party for another friendly battle. Defeat Jinx in 3 battles and he’ll give you the Jinx’s Belt. This accessory is valuable because of its high stats growth. It prevents instant death, increases both attack and defense by 27 and speed by 12. You can also sell it for staggering 999 coins.

Photobucket


Acquiring the Amulet

In Booster’s Tower “Hide in Curtains” mini-game, do not let yourself get caught by the Snifits to obtain the Amulet.

There are 4 curtains where Mario can hide. Arranged from left to right, here is the order where the Snifits make their searches:

1) Sniffit A
3, 4, 2, 1, 4

2) Sniffit’s A and B
2 - 4, 1 - 3, 2 - 3, 2 - 4, 3 - 4, 2 - 3, 1 - 2

3) All 3 Sniffits
4-1- 2, 3- 1- 3

Castlevania Symphony of the Night Game Script (2 of 2)

Castlevania Symphony of the Night Game Script

XII - Grim Reaper

Death: So you've made it this far…

In the name of your Father, cease this foolishness.

Alucard: Not while there is a breath in my body.

Death: Then for the Master, I'll feast on your soul this night!

(Alucard and Death settle their old score in a deadly battle.)


XIII.A - The Dark Priest (Low Map Completion Rate)

Shaft: You have done well in making it this far. I would expect no less from the son of our Master.

Alucard: So you are the one called Shaft?

Shaft: I am he.

Alucard: Why did you make Belmont lord of this castle?

Shaft: For centuries, vampire hunters have defeated evil with holy power. But if two vampire hunters were to fight each other…

Alucard: But Belmont's power is supreme among vampire hunters. None other could defeat him.

Shaft: Exactly. That's why I removed him as a threat by making him into lord of this castle.

Alucard: But your plan has failed.

Shaft: Has it indeed?

We'll see what happens after I destroy your weak human side.

(The anticipated battle begins. After exchanging blows in a deadly fight, Alucard defeated the dark priest.)

Shaft: Ugh... no!

Alucard: You claimed to love the darkness, go then and dwell there for all eternity!

Shaft: One who plays so close to the fire can't fail but to be burned…

Aaaaaaahhhhhh!


XIII.B - The Dark Priest (High Map Completion Rate)

Shaft: You have done well in making it this far. I would expect no less from the son of our Master.

Alucard: So you were the one who was controlling Belmont.

Shaft: Yes, I am the Dark Priest called Shaft. This world must be cleansed with the forge of chaos.

Alucard: Why did you make Belmont lord of this castle?

Shaft: For centuries, vampire hunters have defeated evil with holy power. But if two vampire hunters were to fight each other…

Alucard: But Belmont's power is supreme among vampire hunters. None other could defeat him.

Shaft: Exactly. That's why I removed him as a threat by making him into lord of this castle.

Alucard: But your plan has failed.

Shaft: Has it indeed?

We'll see what happens after I destroy your weak human side.

(The anticipated battle begins. After exchanging blows in a deadly fight, Alucard defeated the dark priest.)

Shaft: Ugh... no!

Alucard: You claimed to love the darkness, go then and dwell there for all eternity!

Shaft: Bu... but my goal is achieved…

Count Dracula has come to purify this corrupt world with the shearing flames of chaos.

Aaaaaaahhhhhh!

(Shaft died.)


XIV.A - Final Battle: Father and Son (Low Map Completion Rate)

Alucard: This must not be…

Father, once again it must seem we must come to blows.

Dracula: Well met, my son!

It’s been a long time.

Alucard: I was hoping we would not see each other again. I can't allow you to leave here, Father.

Dracula: You have ever been the ally of humans. Have you forgotten what they did to your Mother?

Alucard: Think you I would forget such a thing? No. But neither do I seek revenge against them.

Dracula: Still uttering the same nonsense. No matter. Now is the time to put aside your weak human side and join me in remaking this world!

Alucard: Dracula, in the name of my Mother, I will defeat you again.

(Dracula transform into his true form.)

Dracula: Behold my true form and despair!

(Finally, the battle between good and evil has just reach its climax, as father and son fights for the separate paths they have chosen. In the end, good overpowered evil. Dracula is once again doomed to rest to his infernal abode.)

Alucard: Go back whence you came!

Trouble the soul of my Mother no more!

Dracula: How? How is it that I have been so defeated?

Alucard: You have been doomed ever since you lost the ability to love.

Dracula: Ah… sarcasm.

‘For what profit is it to a man, if he gains the world, and loses his own soul?’ Matthew 16:26 I believe.

Alucard: ………….

Dracula: Tell me. What... What were Lisa's last words?

Alucard: She said “Do not hate humans. If you cannot live with them, then at least do them no harm. For their’s is already a hard lot. She also said to tell you, that she would love you for all of eternity…”

Farewell Father…

Believe it or not, I shall miss you.

(Dracula breathed his last and a beam of light swallowed the darkness to his eternal rest.)

Castlevania Symphony of the Night


XIV.B - Final Battle: Father and Son (High Map Completion Rate)

Alucard: Father…

Dracula: Well met, my son!

It’s been a long time.

Alucard: I was hoping we would not see each other again. I can't allow you to leave here, Father.

Dracula: You have ever been the ally of humans. Have you forgotten what they did to your Mother?

Alucard: Think you I would forget such a thing? No. But neither do I seek revenge against them.

Dracula: Still uttering the same nonsense. No matter. Now is the time to put aside your weak human side and join me in remaking this world!

Alucard: Dracula, in the name of my Mother, I will defeat you again.

(Dracula transform into his true form.)

Dracula: Behold my true form and despair!

(Finally, the battle between good and evil has just reach its climax, as father and son fights for the separate paths they have chosen. In the end, good overpowered evil. Dracula is once again doomed to rest to his infernal abode.)

Alucard: Go back whence you came!

Trouble the soul of my Mother no more!

Dracula: How? How is it that I have been so defeated?

Alucard: You have been doomed ever since you lost the ability to love.

Dracula: Ah… sarcasm.

‘For what profit is it to a man, if he gains the world, and loses his own soul?’ Matthew 16:26 I believe.

Alucard: ………….

Dracula: Tell me. What... What were Lisa's last words?

Alucard: She said “Do not hate humans. If you can not live with them, then at least do them no harm. For their’s is already a hard lot. She also said to tell you, that she would love you for all of eternity…”

Dracula: Lisa, forgive me. Farewell my son…

(Dracula breathed his last and a beam of light swallowed the darkness to his eternal rest.)


XV.A - Good Ending (Low Map Completion Rate)

Alucard: So you made it.

Maria: Alucard!

I'm glad your aright!

Richter: I'm sorry.

T'is my fault you had to fight your own father…

Alucard: Fear not. I had my own reasons for destroying him.

Richter: It must have been painful for you.

Alucard: Indeed. But you must always remember that the only thing necessary for evil to triumph is for good men to do nothing…

Richter: I understand.

Maria: Alucard, what will you do now?

Alucard: The blood that flows in my veins is cursed. ‘Twould be best for this world if I disappeared forever.

Maria: ………….

I see...

Alucard: Farewell then. We’ll not meet again.

Maria: ………….

Alucard…

Richter: Don't you want to go after him, Maria?

Maria: No... its best this way.

I can't ease his torment.

Someday perhaps we will meet again and on that day, maybe.

Richter: I see…

Maria: Lets go. Everyone's waiting for us.

Richter: Yes, let’s get out of here.


XV.A - Good Ending (High Map Completion Rate)

Alucard: So you made it.

Maria: Alucard!

I'm glad your aright!

Richter: I'm sorry.

T'is my fault you had to fight your own father…

Alucard: Fear not. I had my own reasons for destroying him.

Richter: It must have been painful for you.

Alucard: Indeed. But you must always remember that the only thing necessary for evil to triumph is for good men to do nothing…

Richter: I understand.

Maria: Alucard, what will you do now?

Alucard: The blood that flows in my veins is cursed. ‘Twould be best for this world if I disappeared forever.

Maria: ………….

I see...

Alucard: Farewell then. We’ll not meet again.

Maria: ………….

Alucard…

Richter: Don't you want to go after him, Maria?

Maria: ………….

I'm sorry.

I can't let him disappear from my life.

Richter: Its aright.

Go after him.

Perhaps you can save his haunted soul.

Maria: Thank you Richter…

Fare thee well.

Richter: And yourself, dear lady.

Castlevania Symphony of the Night


XVI - Ferryman (First Meeting)

Ferryman: I'll take you to a place which might be interesting for you. Hehehehe.


XVII - Ferryman (Second Meeting)

Ferryman: I'll guide you to meet your destiny.


XVIII - Faerie Familiar Introduction

(Can only be trigger from the first time you summon the Faerie familiar while there are no enemies that can interrupt the scene.)

Faerie Familiar: Thank you for giving me life.

Your word is my command.

Lets go. I'll follow you anywhere.


IXX.A - Breakable Wall (A)

(When there is a breakable wall nearby.)

Faerie Familiar: There is something funny about this wall.


IXX.B - Breakable Wall (B)

(When there is a breakable wall nearby.)

Faerie: This is really suspicious looking.


XX.A - Transformation Hint (A)

(If Alucard is next to a barricade where a mist can pass through.)

Faerie Familiar: If only you could transform into mist.


XX.B - Transformation Hint (B)

(If Alucard is in the dark and spiky room in Main Castle’s Catacombs.)

Faerie Familiar: Don't forget that some animals can live in complete darkness.


XXI - Devil Familiar Introduction

(Can only be trigger from the first time you summon the Devil familiar while there are no enemies that can interrupt the scene.)

Devil Familiar: Command me my lord and master.

I'm ready to serve master.


XXII.A - Pressing a Switch (A)

(When there is a switch nearby.)

Devil Familiar: Hmm… A switch. Why don't I press it and see.


XXII.B - Pressing a Switch (B)

(When there is a switch nearby.)

Devil Familiar: Hmm… This switch hasn't been pressed yet.

Castlevania Symphony of the Night


XXIII - Sword Familiar Introduction

Sword Familiar: Have you power enough to wield me?


XXIV.A - Battle Quotes (A)

Sword Familiar: I won't let you get in my way!


XXIV.B - Battle Quotes (B)

Sword Familiar: You have grown mighty my master.


XXIV.C - Battle Quotes (C)

Sword Familiar: I grant you my power!


XXIV.D - Battle Quotes (D)

Sword Familiar: Its my pleasure!


Previous | 1 | 2 | Next

Castlevania Symphony of the Night Game Script (1 of 2)

Castlevania Symphony of the Night Game Script

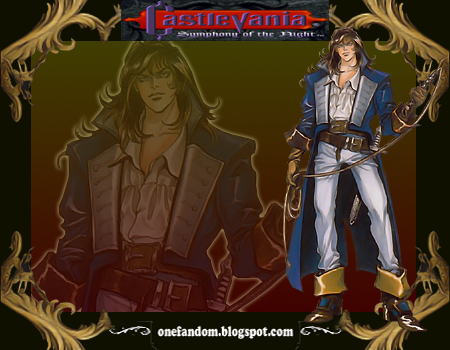
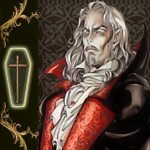
I - A Battle from the Past

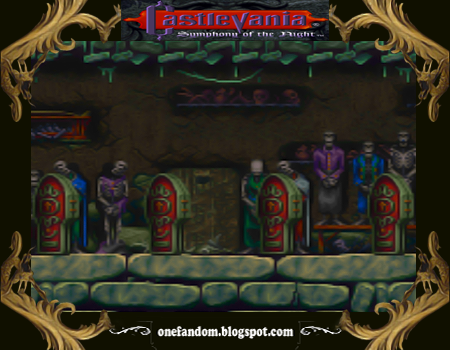
(Richter Belmont finally made his way to Dracula’s throne room. Inside, the Lord of Darkness himself is sitting idly on his throne with a glass of blood in his hand. The arrival of the vampire hunter seems not so surprising to a monster who fought several battles in the past against those who seek his demise, wherein the bloodline of Belmonts became a legend.)

Richter: Die Monster, you don't belong in this world.

Dracula: It was not by my hand that I am once again given flesh.

I was called here by humans, who wish to pay me tribute.

Richter: Tribute? You steal men's souls, and make them your slaves!

Dracula: Perhaps the same can be said of all religion.

Richter: Your words are as empty as your soul. Mankind ill needs a savior such as you.


Dracula: What is a man?

A miserable little pile of secrets!

But enough talk, have at you!

(Bloodlines final battle starts. After exchanging blows with Dracula, Richter starts to lose his strength. Young Maria Renard enters in to lend her power to her brother-in-law.)

Maria: Richter! I give you my strength!

(Maria’s power began to enter Richter’s body, which give the vampire hunter an invigorating strength to continue. The battle begins anew, Dracula is overpowered by the Belmont’s prowess and the Vampire Killer’s holy power.)

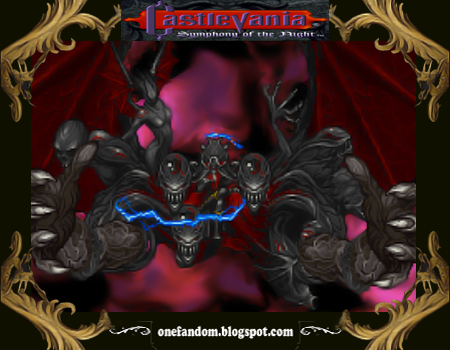
Dracula: Grant me… my power!

(Dracula transforms into a more diabolical monster, but in the end, the power of good overcomes that of evil.)

Dracula: No! It can’t be! Ahhhhhhhhhhh…!

(After a vicious battle, the Lord of Darkness is once again sent to his eternal slumber. Yet another Belmont brought peace to Wallachia and to the rest of the world.)


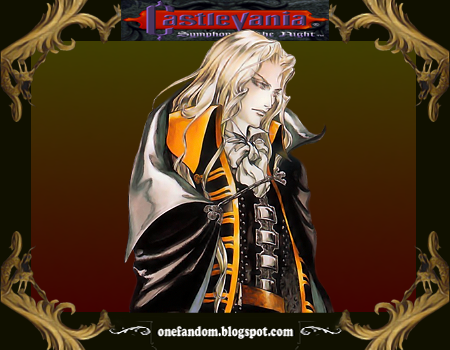
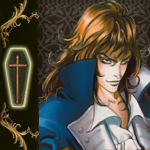
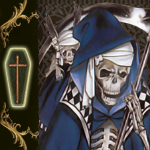
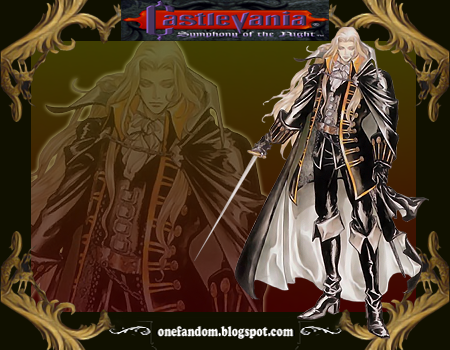
II - Dracula’s Confidant

(Alucard makes his way to the Castle’s Entrance. Along the way he meet the Grim Reaper who was one of his father’s loyal comrade.)

Death: Ah, Alucard.

What is your business here?

Alucard: I have come to put and end to this.

Death: Still befriending mortals.

I'll not ask you to return to our side. But I demand you cease your attack.

Alucard: I will not.

Death: You shall regret those words.

Alucard: We will meet again.

(Death removes all Alucard’s armaments and vanishes away.)


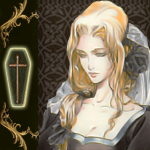
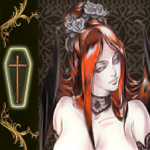
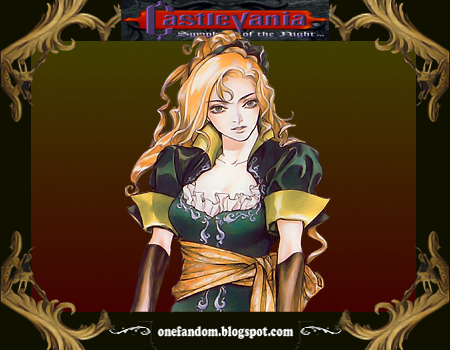
III - A Vampire Huntress

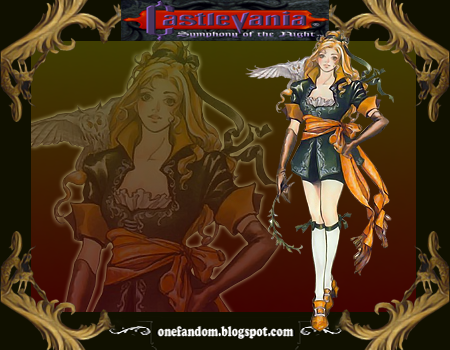
(Alucard explores Castlevania deeper until he meet an unlikely guest in such perilous place. The presence of a human caught his attention as he came across the clock tower in Marble Gallery.)

Maria: Wait a moment, you seem human and yet, what do you here?

Alucard: I've come to destroy this castle.

Maria: Then we have the same purpose. I'll trust you for now.

I'm Maria, who are you?

Alucard:……….

Alucard.

Maria: Not the talkative type I can see.

Well perhaps we will meet again. If you live that long. Fare well.

Castlevania Symphony of the Night


IV.A - Greedy Old Friend

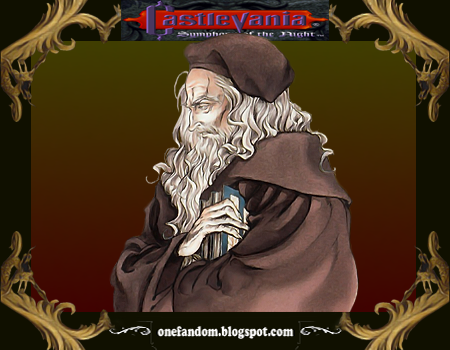
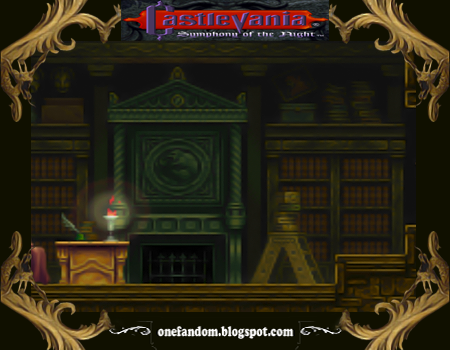
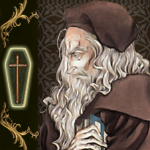
(Alucard visits an old friend in the castle’s Long Library.)

Alucard: Its been a long time old one.

Librarian: Oh! Its you master Alucard.

What do you need?

Alucard: I need your help.

Librarian: Young master.

I cannot help one that apposes the master.

Alucard: You won't go unrewarded.

Librarian: Really?

In that case, just tell me what you need.

(Alucard draws closer to check his inventory.)

Librarian: What can I do for you?

Alucard: I'm interested in this.

(Alucard wants to buy the Jewel of Open relic, which unlocks magically sealed doors.)

Librarian: Is this alright?

Alucard: Hmmm… I suppose so.

Librarian: He he… Thank you.

Fare well for now.


IV.B - Greedy Old Friend

(If Alucard cancels his purchase or sell.)

Alucard: No forget it.

Librarian: I see, well in that case.


V - Demon Castle’s Incarnations

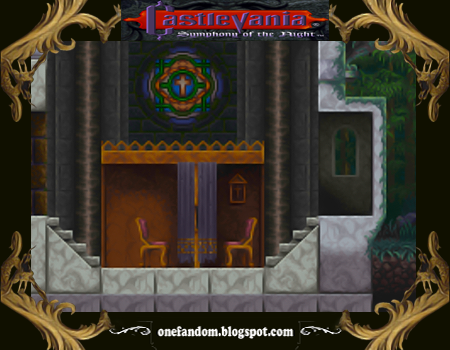
(As Alucard makes his way to the castle’s Royal Chapel, he meet Maria once again.)

Maria: So we met again Alucard.

Alucard: It seems so.

Maria: As friendly as ever I see.

Its strange. This castle is different then I remember it.

Alucard: …………..

This castle is a creature of chaos. It may take many incarnations.

Maria: I can't trust my memories huh?

Oh well I'll do my best. Good luck.


VI - In Search of a Belmont

(As Alucard fights the Hippogryph in Royal Chapel, Maria is watching him from afar. After the battle, she approaches him.)

Maria: Impressive, you’re very strong.

Alucard: ……………

What is it you want? You didn't come here to tell me that.

Maria: Your right.

Do you know that name Richter Belmont?

Alucard: Of the Belmont clan? Of course but...

Maria: He disappeared about a year ago. And I'm sure he's here.

If you see him, please let me know.

Alucard: As you wish my lady.

Maria: Thank you. So you do know how to be a gentleman.

Castlevania Symphony of the Night


VII.A - New Lord of the Castle (A)

(Alucard enters the arena in Colosseum when suddenly...)

Richter: Hahahahaha!

Alucard: Who are you!?

Richter: Open Hell’s gate! Come forth my servants!

Alucard: The scent of your blood… your a Belmont!

Richter: Crush this flea who invades my castle!


VII.B - New Lord of the Castle (B)

Richter: Hahahahaha!

Alucard: Who are you?

Richter: Welcome to my castle.

Alucard: The scent of your blood… your a Belmont!

Richter: Enough small talk.

Come forth my servants.

Hahahaha!

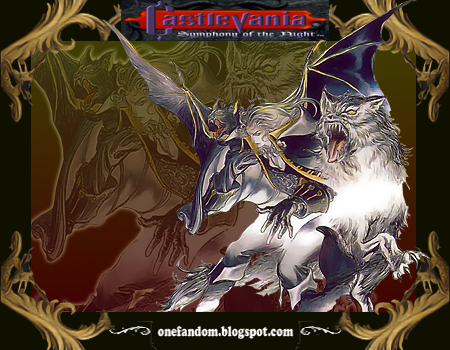
(Richter vanishes as the fight in the arena begins. After defeating the Werewolf and Minotaurus, Alucard wonders about the Belmont he had just met.)

Alucard: I'm certain that was a Belmont. So he says he is the lord of this castle…


VIII.A - Haunted Past

(In the Underground Caverns, Alucard take a rest in a corrupted coffin which sucks the horrendous memory of those who are unaware of its dark power. In the Nightmare, Alucard finds himself in a familiar scene which he never dreamed of seeing again.)

Alucard: !!

Mother!!

Fake Lisa: That voice! Alucard, its you!

Alucard: I'm coming Mother! I'll save you!!

Fake Lisa: No Alucard! Don't come here!

Alucard: But Mother!

Fake Lisa: Its alright! If my death can save others, I'd gladly surrender my life.

Alucard: Mother! No…!

Please! No…!

Fake Lisa: Yes Alucard! Watch me die, and remember always my last words to you…

Alucard: Yes Mother…

Fake Lisa: You must despise humans. They are to be your prey.

Alucard: What?!…

Fake Lisa: Better for them to die than to let them compound their sins. Begin by slaying that one, over there.

Alucard: No… it wasn't like this…

Fake Lisa: What's wrong? Alucard?

Alucard: My mother never said such a thing…

Fake Lisa: What do you mean?! Kill them and bring them happiness!

Alucard: No… You’re not my mother! What kind of demon are you?!

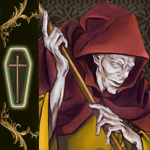
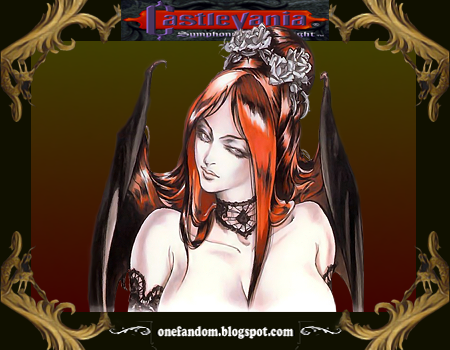
(The spell is broken. The demon who controls Alucard’s dream reveals her true form.)

Succubus: Hehehahahaha…

You broke free of my spell.

I like that.

Alucard: Demon, death is too good for you!

Succubus: Come here little boy and show me what you've got.

(Enraged by the desecration of his mother’s memory, Alucard fights Succubus with avenging heart. Finally, his revenge bears fruit as the lewd demon falls down on her knees.)

Succubus: Darkling! I smell your blood.

You’re a vampire…? Could it be…?

Alucard: ……….

That strength, that beauty… Your the son of Lord Dracula.

Alucard: Death in the dream world will set your soul wondering for eternity, Demon.

Succubus: Wait, I beg of you! Ahhhhhhhh!


VIII.B - Haunted Past

(If Alucard was defeated.)

Succubus: Now, you'll be my own personal slave.

Hehahahaha.


IX - Inconvenient Truth

(Once again Alucard meet Maria in the Royal Chapel.)

Maria: So, did you find Richter?

Alucard: I don't know if he's the one you’re looking for, but I found a Belmont…

Maria: Really?

So he is here!

Alucard: But the one I saw was the enemy. He was the lord of this castle…

Maria: That can’t be true!

You’re wrong!

I.. I must go now.

Castlevania Symphony of the Night


X.A - A Hidden Enemy (A)

(Alucard manages to unlock a hidden room below the clock tower in Marble Gallery. He delve deeper inside until he enters the bottommost room.)

Maria: Alucard?

Alucard: That voice? Maria?

Maria: I'm sorry. You were right. He has joined forces with the enemy…

Alucard: So it was a Belmont after all…

Maria: But some one must be controlling him…

Whatever we do we can't harm Richter.

Alucard: But he must be stopped.

Maria: I know.

Well… here. Take these with you.

Alucard: What are these?

Maria: If you wear these you can see beyond evil illusions.

Alucard: Thank you.

T'is best then if you pray for the soul of your friend.


X.B - A Hidden Enemy (B)

Maria: Alucard?

Alucard: That voice? Maria?

Maria: I'm sorry. You were right. He has joined forces with the enemy…

Alucard: So it was a Belmont after all…

Maria: But some one must be controlling him…

Whatever we do we can't harm Richter.

Alucard: But he must be stopped.

Maria: I know... here, take these glasses with you.

Alucard: What are these?

Maria: If you wear these you can see beyond evil illusions.

Alucard: Thank you.

T'is best then if you pray for the soul of your friend.

Maria: I thought you might be the one… But I guess I was wrong.

Alucard you are the only one I can count on.

Please save Richter.

Alucard: I'll do my best.


XI.A - Showdown with a Belmont (Bad Ending A)

(If Alucard fights Richter without acquiring the Holy Glasses.)

Richter: I've been waiting for you.

Alucard: So it is you… But why is a Belmont planning the resurrection of Count Dracula.

Richter: Count Dracula rises but once every century, and my role is over.

If I could resurrect him, then the battle would last for eternity!

(The inevitable battle finally begins.)

Richter: Magnificent!

But now feel my unbridle wrath.

(Richter concentrates and unleashes his holy power. The battle starts anew, which proves to be a tough fight for both of them. After a vicious battle between two lionhearted warriors, Alucard somehow manages to overcome the new lord of the castle.)

Alucard: Its over… Belmont.

Richter: So the war between humans and vampires finally ends here…

Alucard: …………

Richter: What need of the shepherd when the wolves have all gone…

My time in this world has come to an end…

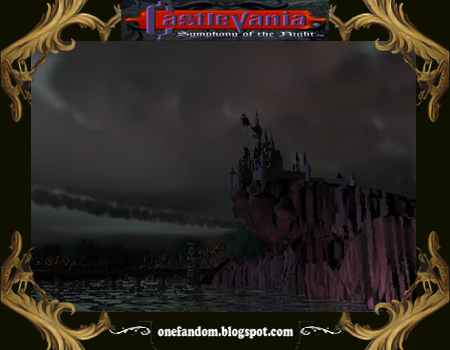
(Richter died. A huge light from above sucks in and obliterates Castlevania. Outside, Alucard stands on a floating debris on the lake while watching the remains of the castle. )

Alucard: Mankind continues to fight, but it is a desperate fight to stay alive.

I suppose he chose a life of warfare since that was the only way that he knew.

Like you Father, he chose a path of destruction…

Farewell land of my birth. Never again will these eyes gaze upon your beauty.


XI.B - Showdown with a Belmont (Bad Ending B)

(If Alucard acquired the Holy Glasses, but never wear them in his fight against Richter.)

Richter: I've been waiting for you.

Alucard: Answer me! Why is a Belmont planning the resurrection of Count Dracula.

Richter: Count Dracula rises but once every century, and my role is over.

If I could resurrect him, then the battle would last for eternity!

(The inevitable battle finally begins.)

Richter: Magnificent!

But now feel my unbridle wrath.

(Richter concentrates and unleashes his holy power. The battle starts anew which proves to be a tough fight for both of them. After a vicious battle between two lionhearted warriors, Alucard somehow manages to overcome the new lord of the castle.)

Alucard: Its over… Belmont.

Richter: So the war between humans and vampires finally ends here…

Alucard: …………

Richter: What need of the shepherd when the wolves have all gone…

My time in this world has come to an end…

(Richter died. A huge light from above sucks in and obliterates Castlevania. Outside, Maria stands on a floating debris on the river while watching the remains of the castle. When suddenly…)

Alucard: So you made it.

Maria: Alucard!

How's Richter?

Alucard: I'm sorry...

Maria: I see…

Thank you for stopping him…

Do you suppose that this too was Fate?

Alucard: ………….

So your journey is over as well then?

Maria: No, not until I learn what caused Richter's madness.

Alucard: I understand…

Well then. May the gods guard you along the way. Farewell.

Maria: You as well Alucard. Good-bye.

Castlevania Symphony of the Night


XI.C - Showdown with a Belmont (Good Ending Path)

(If Alucard wears the Holy Glasses in battle and defeated Shaft.)

Richter: I've been waiting for you.

Alucard: Answer me! Why is a Belmont planning the resurrection of Count Dracula.

Richter: Count Dracula rises but once every century, and my role is over.

If I could resurrect him, then the battle would last for eternity!

Alucard: ……………..

If those are your true feelings, then so be it.

(The inevitable battle finally begins. With the power of the Holy Glasses, Alucard can see the true enemy behind Richter’s madness. Thus, he keeps evading his holy whip while attacking the one controlling the vampire hunter. After a vicious battle between two lionhearted warriors, Alucard finally breaks Shaft’s evil illusion.)

Shaft: You’ve defeated me. But all is not yet lost.

The resurrection of Count Dracula is at hand! Hehahaha!

(Shaft teleports himself. Outside, the purple night skies suddenly looms as a new castle unfolds before them. Another demon castle, an inverted one that mirrors the original Castlevania. However, the same evil power covers the whole place and the presence of the Lord of Darkness invites death to unwary adventurers. Meanwhile, Richter gradually regains his old self.)

Richter: No… what have I done…

(Maria suddenly arrives in the throne room.)

Maria: Thank you Alucard, for saving Richter.

Richter: Alucard?!

The same Alucard who fought alongside with my ancestor Trevor Belmont?… That was over 300 years ago!

Alucard: No time for small talk. Is the person who controlled you in that castle over there?

Richter: Yes, I think so…

(Alucard turns to Maria.)

Alucard: Maria, take Richter and leave here. I’ll finish this.

Maria: Alright…

Good luck!

(Alucard leaves and head into the inverted castle above.)


Previous | 1 | 2 | Next

Related Post

Related Posts Plugin for WordPress, Blogger...

Comments