Item List 4 of 4

Item List
Castlevania: Dawn of Sorrow

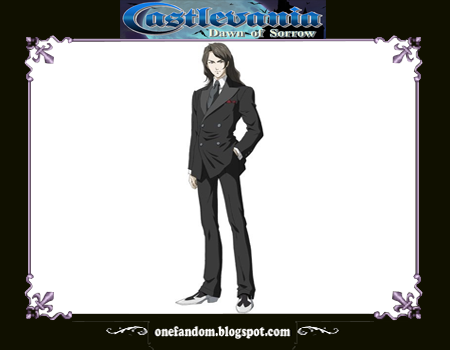
151) Pitch Black Suit
A suit that is the color of inky darkness.

Buy: N/A
Sell: $9800
Effects: DEF +29 and INT +2.
Location: Pitch Black Suit is an item drop of Succubus.
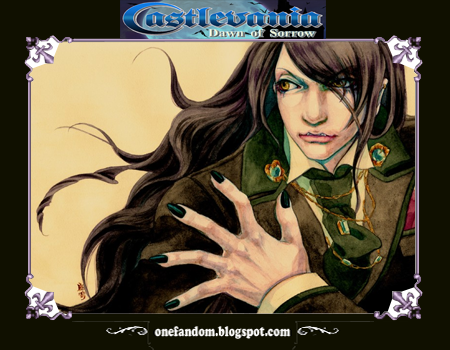

152) Olrox's Suit  
A suit favored by Count Olrox.

Buy: N/A
Sell: $12000
Effects: DEF +39, STR +2, CON +2 and INT +2.

Location: From the Warp Room of Demon Guest House, head 4 rooms right, up, middle left and 4 rooms left. Olrox’s Suit is just left to Paranoia’s (boss that lurks in mirrors) room.


153) Dracula's Tunic
A tunic imbued with Dracula's dark power.

Buy: N/A
Sell: $19500
Effects: ATK +2, DEF +47, STR +6, CON +6, INT +6 and LCK+6.

Location: From the bottom right Save Room of Demon Guest House, head left, bottom left and left. You’ll end up in the control room of the puzzle piece’s area. There’s a big mirror in the top rightmost room of that area. Enter the mirror using the Paranoia soul to get the Dracula’s Suit inside.


Mails and Plates

154) Leather Armor
A suit of armor crafted out of leather.

Buy: $800
Sell: $400
Effects: DEF +8.
Location: Leather Armor is available from Hammer’s shop and an item drop of Axe Armor.


155) Breastplate  
A breastplate fashioned from iron.

Buy: $1880
Sell: $940
Effects: DEF +12.
Location: From the Garden of Madness Warp Room, head right and up. The Breastplate is on the top of a pillar in the middle of the room.

Breastplate is also available from Hammer’s shop and an item drop of Bomber Armor and Valkyrie.


156) Ring Mail    
A mail suit with metal rings sewn on.

Buy: $2800
Sell: $1400
Effects: DEF +16.

Location: From the rightmost Save Room of Demon Guest House, head 2 rooms left. You’ll end up in the control room of puzzle piece’s area. Ring Mail is beside the big mirror in the top rightmost room.

Ring Mail is also available from Hammer’s shop and an item drop of Great Armor.


157) Scale Mail    
A mail suit with scale-like plates sewn on.

Buy: $4200
Sell: $2100
Effects: DEF +20.

Location: From the top Save Room of Cursed Clock Tower, head left, down, right, left, right, 2 rooms left and right. You’ll end up in a room with a big mirror. Scale Mail is located beside that mirror.

Scale Mail is also available from Hammer’s shop and an item drop of Disc Armor.


158) Chain Mail    
A suit made of woven chains.

Buy: N/A
Sell: $4000
Effects: DEF +25.

Location: From the topmost Save Room of Subterranean Hell, head left, 3 rooms right and down. You’ll end up in a very huge underwater area full of Fish Heads and Needles. Chain Mail is on the top left platform.

Chain Mail is also an item drop of Great Axe Armor.


159) Hauberk      
Chain mail made for easy movement.

Buy: N/A
Sell: $ 4900
Effects: DEF +31.

Location: Hauberk is an item drop of Erinys.


160) Cuirass      
A torso armor with a rounded profile.

Buy: N/A
Sell: $ 7000
Effects: DEF +38.

Location: Cuirass is an item drop of Final Guard.


161) Blocking Mail
A mail suit that occasionally blocks attacks.

Buy: N/A
Sell: $13045
Effects: DEF +25.

Location: Blocking Mail is an item drop of Dead Crusader.


162) Eversing      
An armor tempered by a waterfall over many millenniums.

Buy: N/A
Sell: $15000
Effects: DEF +46.

Location: From the bottom Save Room of Mediterranean Hell, head 2 rooms right. You’ll end up in a very huge waterfall area where Medusa’s Head, Mermen and Dead Pirates roam the place. In the middle leftmost corner (besides the waterfall) is a breakable wall. Eversing is located inside the hidden room.


163) Demon’s Mail    
A mail suit that is imbued with demonic power.

Buy: N/A
Sell: $33000
Effects: DEF +56.

Location: Demon’s Mail is also an item drop of Arc Demon.


Robes

164) Silk Robe    
A robe made of woven silk.

Buy: $800
Sell: $400
Effects: DEF +4 and INT +2.

Location: Silk Robe is available from Hammer’s shop and an item drop of Persephone.


165) Mage Robe    
A robe woven by mages.

Buy: N/A
Sell: $1150
Effects: DEF +10 and INT +5.

Location: Mage Robe is an item drop of Witch.

Castlevania: Dawn of Sorrow

166) Elfin Robe    
A robe woven by elves.

Buy: N/A
Sell: $2500
Effects: DEF +16 and INT +8.

Location: Head 3 rooms left from the upper Save Room of Garden of Madness. Elfin Robe is on the upper left platform of the room.


167) Wyrm Robe    
A fire-resistant robe made from the hide of a wyrm.

Buy: N/A
Sell: $7500
Effects: DEF +42.

Location: Wyrm Robe is an item drop of Flame Demon.


168) Aquarius      
A water-resistant robe that is imbued with elemental power.

Buy: N/A
Sell: $7500
Effects: DEF +28.

Location: From the Warp Room of Wizardry Lab, head left, bottom right and right. You’ll end up in a room where the Creature stands near the door where you came out. Behind the enemy is a wall, which control switch is on the other side. The Aquarius is just beside that control switch.

Aquarius is also an item drop of Frozen Shade.


169) Serenity Robe
A blessed robe that calms the spirit.

Buy: N/A
Sell: $11500
Effects: DEF +34 and INT +10.

Location: From the bottom Save Room of Subterranean Hell, head 2 rooms left, bottom left, and 3 rooms left. You’ll end up in a place where the Homunculi are made. The Serenity Robe is on the middle top platform of that submerge area.


170) Death's Robe  
A robe once worn by Death.

Buy: N/A
Sell: $21000
Effects: ATK +1, DEF +44, STR +4, CON +4, INT +15 and LCK +4.
Location: Beat Boss Rush Mode under 7 minutes.


IV - Accessories

Earrings

171) Hoop Earring  
An earring in the shape of a hoop.

Buy: N/A
Sell: $500
Effects: DEF +1 and INT +1.

Location: From the upper Save Room of Dark Chapel, head right, bottom right and right. In the room just outside where you fought Dmitrii, there’s a ledge on the top right where the Hoop Earring is located.


172) Turquoise Stud
A stud earring embedded with a blue-green gem.

Buy: N/A
Sell: $1000
Effects: DEF +2 and INT +1.

Location: From the rightmost Save Room of Demon Guest House, head 2 rooms left. You’ll end up in the control room of puzzle piece’s area. Turquoise Stud is inside room number “8”.

173) Silver Stud  
A stud earring made of silver.

Buy: N/A
Sell: $2000
Effects: DEF +3 and INT +1.

Location: Found in Condemned Tower lower area. Just outside the room with flowing dark energy on its floor and where Julius used the Belmonts’ “Grand Cross” skill. Silver Stud is on the topmost platform.


174) Gold Stud    
A stud earring made of gold.

Buy: N/A
Sell: $3000
Effects: DEF +4 and INT +1.

Location: Found on the middle left ledge just below the Castle’s drawbridge.


175) Bloody Stud  
A deep-red stud earring made of ruby.

Buy: N/A
Sell: $4000
Effects: DEF +4 and INT +2.

Location: From the bottom Save Room of Mediterranean Hell, head 2 rooms left, bottom left, and 5 rooms left. You’ll end up in a place where the Homunculi are made. The Bloody Stud is on the bottom right floor.


176) Platinum Stud
An expensive stud earring made of platinum.

Buy: N/A
Sell: $5000
Effects: DEF +5 and INT +1.

Location: From the bottom left Save Room of the Cursed Clock Tower, head right, top right, up and right. You’ll end up in a small room with a big mirror in the middle. Enter the mirror using the Paranoia soul to get the Platinum Stud inside.


177) Tear of Blood
A red jewel the color of blood.

Buy: N/A
Sell: $15000
Effects: DEF +8, STR +1, CON +1 and INT +1.

Location: From the Hammer’s shop of Lost Village, head left, middle right, left, bottom left and left. You’ll end up in a small room with a big mirror. Enter the mirror using the Paranoia soul. Now, you are transported in a place where there’s another mirror on the right side. Enter that mirror to get the Tear of Blood inside.


Rings

178) Satan's Ring  
A ring once worn by the dark lord.

Buy: N/A
Sell: $33333
Effects: ATK +1, DEF +6, STR +3, CON +3 and INT +3.

Location: From the top Save Room of the Pinnacle, head right, up and 2 rooms left. You’ll end up in a small room before Dario’s (boss) place. Above that room is a breakable ceiling that can be accessed by either Bat Company or Hippogryph souls. The Satan’s Ring is inside the hidden room above.


179) Rare Ring    
A ring that raises the appearance of rare items.

Buy: N/A
Sell: $25000
Effects: LCK +5.
Location: From the Warp Room of Silenced Ruin, just head 4 bottom left rooms. You’ll end up in an a room with breakable blocks. The Rare Ring is on the top left ledge.


180) Soul Eater Ring
A ring that increases the appearance of souls.

Buy: $300000
Sell: $150000
Effects: LCK +5.
Location: Soul Eater Ring is available from Hammer’s shop.

Castlevania: Dawn of Sorrow

181) Rune Ring  
A ring that boosts the speed of MP restoration.

Buy: N/A
Sell: $25000
Effects: DEF +1.

Location: From the bottom right Save Room of Demon Guest House, head left, top right and right. You’ll end up in a horizontal room with two Persephones that roam the place. There’s a breakable ceiling on the top rightmost portion of the room. The Rune Ring is inside the hidden room above.


182) Shaman Ring  
Gain more experience points.

Buy: N/A
Sell: $25000
Effects: DEF +1.

Location: After you defeated Gergoth (boss) in Condemned Tower the middle portion of the tower is completely destroyed. From the Warp Room at the top, head 2 rooms left. You’ll end up in the middle portion destroyed by Gergoth. In that huge room, head to upper left portion (just below where you came out). Then head to the middle left of the vertical room and proceed to 3 more rooms left. You are now inside a room with spikes on its ceiling and full of Medusa’s Head flying around.

In the middle right corner of the spike room is a golden statue that requires you to have “573” as the last digits on your gold. To check your current gold, head to main menu and check the “GOLD” section. After having the necessary requirements, stand next to the statue to open a hidden passage. Shaman Ring is inside that hidden room.


183) Gold Ring    
A ring that makes monsters drop more money.

Buy: N/A
Sell: $25000
Effects: DEF +1.

Location: From the bottom Save Room of Mediterranean Hell, head 2 rooms left, bottom left, 7 rooms left, down and left. You’ll end up in the third submerged area where the Homunculi are made. On the top leftmost platform is another golden statue that requires “666” as the last three digits of your current gold. To check your current money, go to main menu and find the “GOLD” section. If the required amount was met, stand close to the statue to reveal a hidden passage. The Gold Ring is located inside that hidden room.


184) Chaos Ring    
A ring that ceaselessly draws dark power from chaos.

Buy: N/A
Sell: N/A
Effects: DEF +1, STR +1, CON +1 and INT +1.

Location: Found in the Abyss after you collected all available souls including the Hellfire Soul, which can only be acquired after beating the Hard Mode game. From the bottom left area’s top entrance, just head down twice. You’ll end up in a room with 3 Frozen Shades guarding the place. Chaos Ring is on the top left ledge.


Capes

185) Cape        
A plain cape.

Buy: N/A
Sell: $100
Effects: DEF +2.

Location: From Hammer’s item shop, head left, middle right, right, bottom right and right. You’ll end up in a room with a huge mirror. The Cape is just next to that mirror.


186) Traveler Cape
A sturdy cape popular among travelers.

Buy: N/A
Sell: $300
Effects: DEF +3.

Location: From the Warp of Dark Chapel, head right, bottom left, left and middle left. You’ll end up in small room with a White Dragon guarding the place. Traveler Cape is on the ledge at the back of the enemy.


187) Crimson Cloak
A cloak in a vivid crimson color.

Buy: N/A
Sell: $600
Effects: DEF +4.

Location: Found in the top rightmost corner of the Castle’s drawbridge.

188) Black Cloak  
A cloak the color of inky darkness.

Buy: N/A
Sell: $1490
Effects: DEF +5.

Location: Black Cloak is an item drop of Ripper.


Necklaces

189) Pendant      
A plain pendant.

Buy: $80
Sell: $40
Effects: LCK +1.

Location: Pendant is available from Hammer’s shop and an item drop of Ghoul.


190) Heart Pendant
A heart-shaped pendant.

Buy: N/A
Sell: $125
Effects: Increases the rate of heart drops. Bigger hearts also appears.

Location: From the first Save Room of Lost Village, head left, top right and 2 rooms right. You’ll end up in an open-air area where a Warg and Skeleton Ape roam the place. The Heart Pendant is on the upper platform, at the top rightmost corner of the area.

Heart Pendant is also an item drop of Heart Eater.


191) Skull Necklace
A macabre necklace.

Buy: N/A
Sell: $333
Effects: DEF +5, INT +2 and LCK -1

Location: Skull Necklace is an item drop of Devil.


192) Flame Necklace
A necklace that symbolizes fire.

Buy: N/A
Sell: $250
Effects: DEF +2 and INT +5.

Location: Flame Necklace is an item drop of Succubus.


193) Rosary        
Beads with a cross made of silver.

Buy: N/A
Sell: $5000
Effects: DEF +3 and INT +10.

Location: From the upper Save Room of Wizardry Lab, head left, top left, left and right. You’ll end up in a room with a big mirror. Enter the mirror using the Paranoia soul to get the Rosary inside.


Neckerchiefs

194) Scarf    
A scarf made of knitted wool.

Buy: $370
Sell: $185
Effects: DEF +2 and CON +2.

Location: From the first Save Room of Wizardry Lab, head right, bottom left, left and bottom left. You’ll end up in a room divided by an impregnable wall in which switch is on the other side. The Scarf is just beside that wall.

Scarf is also available from Hammer’s shop.


195) Red Scarf    
A red scarf that has an air of melancholy.

Buy: $1180
Sell: $590
Effects: DEF +4 and CON +5.

Location: From the top Save Room of Subterranean Hell, head 4 rooms left, bottom right and right. You’ll end up in a small room with a big mirror in the middle. The Red Scarf is just next to that mirror.

Red Scarf is also available from Hammer’s shop.

Castlevania: Dawn of Sorrow

196) Neck Warmer  
A cold-beating garment made of a new synthetic material.

Buy: N/A
Sell: $4400
Effects: DEF +8 and CON +10.

Location: From Yoko’s synthesis room of Lost Village, head right, down and 2 rooms right. You’ll end up in an underground’s huge vertical room. Neck Warmer is on the middle right ledge (in front of the passage way where you came out).


Belts

197) Power Belt    
A belt that provides support to muscles.

Buy: N/A
Sell: $1250
Effects: ATK +1, DEF +3 and STR +2.

Location: From the upper Save Room of Dark Chapel, head right and left. You’ll end up in a huge room where there’s a Ghost and Witch. The Power Belt is on the top left ledge.


198) Black Belt    
A black belt worn by skilled fighters.

Buy: N/A
Sell: $2750
Effects: ATK +3, DEF +2 and STR +5.

Location: Black Belt is an item drop of Werewolf.


199) Megingiord    
A belt worn by a deity of war. It amplifies power.

Buy: N/A
Sell: $5000
Effects: ATK +5, DEF +5 and STR +10.

Location: From the top Save Room of Subterranean Hell, head 4 rooms left, bottom right and right. You’ll end up in a small room with a big mirror in the middle. Enter the mirror using the Paranoia soul to get the Megingiord.


Charms

200) Lucky Charm  
A good-luck charm for prosperity.

Buy: $100
Sell: $50
Effects: LCK +1.

Location: Lucky Charm is available from Hammer’s shop.


201) Mina's Talisman
A talisman from the Hakuba Shrine. Said to suppress dark souls.

Buy: N/A
Sell: N/A
Effects: Suppress dark souls absorbed by Soma.

Location: From the first rightmost Save Room of Demon Guest House, head left and upper right. This item, however, cannot be missed since it is part of the game’s main story. Arikado will hand it down to Soma together with Mina’s letter.


Previous | 1 | 2 | 3 | 4 | Next

Item List 3 of 4

Item List
Castlevania: Dawn of Sorrow

101) Mjollnjr    
A hammer of a thunder-god.

Buy: N/A
Sell: $ 14000
Attribute: Blunt, Lightning
Effects: ATK +20.

Location: In Yoko’s shop, synthesize Morgenstern with Bugbear Soul to create Mjollnjr.


Axes

102) Axe          
A sturdy axe with a single-edged head.

Buy: $800
Sell: $400
Attribute: Piercing
Effects: ATK +32.

Location: Axe is available from Hammer’s shop and an item drop of Axe Armor.


103) Battle Axe    
A combat axe with a double-edged head.

Buy: $7800
Sell: $3900
Attribute: Piercing
Effects: ATK +46.

Location: Battle Axe is available from Hammer’s shop. In Yoko’s shop, synthesize Axe with Axe Armor Soul to create Battle Axe.


104) Bhuj          
A very heavy combat axe.

Buy: N/A
Sell: $10000
Attribute: Piercing
Effects: ATK +63.

Location: In Yoko’s shop, synthesize Battle Axe with Manticore Soul to create Bhuj.


105) Great Axe    
A huge battle axe. It is exceptionally heavy.

Buy: N/A
Sell: $20000
Attribute: Piercing
Effects: ATK +80.

Location: In Yoko’s shop, synthesize Bhuj with Great Axe Armor Soul to create Great Axe.


106) Golden Axe    
An axe crafted from gold. Its performance is outstanding.

Buy: N/A
Sell: $31000
Attribute: Piercing
Effects: ATK +100.

Location: In Yoko’s shop, synthesize Great Axe with Final Guard Soul to create Golden Axe.


107) Death Scythe  
A scythe used by Death to gather souls.

Buy: N/A
Sell: $50000
Attribute: Piercing, Dark
Effects: ATK +117.

Location: In Yoko’s shop, synthesize Golden Axe with Death Soul to create Death Scythe.


Punches

108) Bare Knuckles

Buy: N/A
Sell: N/A
Attribute: Blunt
Effects: N/A
Location: Remove any weapon on hand to use Bare Knuckles.


109) Brass Knuckles
Metal knuckles to be worn on fists.

Buy: $200
Sell: $100
Attribute: Blunt
Effects: ATK +3.

Location: Brass Knuckles is available from Hammer’s shop.

110) Cestus        
Hard knuckle guards worn by ancient boxers.

Buy: $6000
Sell: $3000
Attribute: Blunt
Effects: ATK +9.

Location: From the rightmost Save Room of Demon Guest House, head 2 rooms left. You’ll end up in the control room of puzzle piece’s area. Cestus is inside room number “1”.

Cestus is also available from Hammer’s shop. In Yoko’s shop, synthesize Brass Knuckles with Zombie Soul to create Cestus.


111) Whip Knuckle  
Equip to throw whip-like punches.

Buy: N/A
Sell: $8500
Attribute: Blunt
Effects: ATK +14.

Location: In Yoko’s shop, synthesize Cestus with Slaughterer Soul to create Whip Knuckle.


112) Mach Punch    
Enables punches to be thrown at the speed of sound.

Buy: N/A
Sell: $10500
Attribute: Blunt
Effects: ATK +20. Unleashes multiple punches rapidly.

Location: In Yoko’s shop, synthesize Whip Knuckle with Hell Boar Soul to create Mach Punch.


113) Kaiser Knuckle
Imbues knuckles with divine rage.

Buy: N/A
Sell: $16500
Attribute: Blunt
Effects: ATK +9. Unleashes multiple punches with exceptional speed.

Location: In Yoko’s shop, synthesize Mach Punch with Werewolf Soul to create Kaiser Knuckle.


Polearms

114) Spear        
A standard spear.

Buy: $1000
Sell: $500
Attribute: Piercing
Effects: ATK +17.

Location: Just outside the Warp Room of the Lost Village. Located on the upper left ledge.

Spear is also available from Hammer’s shop and an item drop of Armor Knight.


115) Partizan      
A long pole tipped with a broad blade.

Buy: $6400
Sell: $3200
Attribute: Piercing
Effects: ATK +23.

Location: Partizan is available from Hammer’s shop and an item drop of Dead Warrior. In Yoko’s shop, synthesize Spear with Armor Knight Soul to create Partizan.

Castlevania: Dawn of Sorrow

116) Halberd      
A long pole fitted with a wide blade.

Buy: $10000
Sell: $5000
Attribute: Piercing
Effects: ATK +29.

Location: From the topmost Save Room of Subterranean Hell, just head 5 rooms left. You’ll end up in a room with a Hell Boar and White Dragon guarding the place. Halberd is located below the ledge.

Halberd is also available from Hammer’s shop. In Yoko’s shop, synthesize Partizan with Axe Armor Soul to create Halberd.


117) Lance
A spear used by knights.

Buy: N/A
Sell: $8000
Attribute: Piercing
Effects: ATK +34.

Location: From the Save Room of the Pinnacle, head left, up, left, up and 2 rooms right. You’ll end up in the second huge open-air area where Dead Crusaders and Erinys roam the place. The Lance is on the top rightmost ledge.

In Yoko’s shop, synthesize Halberd with Valkyrie Soul to create Lance.


118) Trident      
A three-pronged spear.

Buy: N/A
Sell: $10000
Attribute: Piercing
Effects: ATK +40.

Location: In Yoko’s shop, synthesize Lance with Mini Devil Soul to create Trident.


119) Brionac      
A demonic five-pronged spear.

Buy: N/A
Sell: $16000
Attribute: Piercing
Effects: ATK +49.

Location: In Yoko’s shop, synthesize Trident with Decarabia Soul to create Brionac.


120) Geiborg      
A spear tempered by witches.

Buy: N/A
Sell: $24000
Attribute: Piercing
Effects: ATK +57.

Location: In Yoko’s shop, synthesize Brionac with Slogra Soul to create Geiborg.


121) Longinus      
A spear of divinity.

Buy: N/A
Sell: $34000
Attribute: Piercing
Effects: ATK +66.

Location: In Yoko’s shop, synthesize Geiborg with Erinys Soul to create Longinus.


122) Gungner      
A divine thunderbolt that pierces everything it touches.

Buy: N/A
Sell: $50000
Attribute: Piercing, Lightning
Effects: ATK +40.

Location: In Yoko’s shop, synthesize Longinus with Bugbear Soul to create Gungner.


Katanas

123) Blunt Sword  
A sword with a dull cutting edge.

Buy: $1000
Sell: $500
Attribute: Piercing
Effects: ATK +11.

Location: From the first Save Room of Wizardry Lab, head right and middle right. The Blunt Sword is on the top rightmost ledge.

Blunt Sword is also available from Hammer’s shop and an item drop of Barbariccia.


124) Katana        
A traditional sword used by samurai.

Buy: $9000
Sell: $4500
Attribute: Piercing
Effects: ATK +17.

Location: Katana is available from Hammer’s shop and an item drop of Draghignazzo. In Yoko’s shop, synthesize Blunt Sword with Bomber Armor Soul to create Katana.


125) Kotetsu      
A sword named after the legendary swordsmith, Nagasone Kotetsu.

Buy: N/A
Sell: $7500
Attribute: Piercing
Effects: ATK +20.

Location: From the Warp Room of Dark Chapel, head right and middle right. You’ll end up on a very huge open-air area. Kotetsu is on the topmost right ledge.

Kotetsu is also an item drop of Malacoda. In Yoko’s shop, synthesize Katana with Mini Devil Soul to create Kotetsu.


126) Masamune      
A famed Japanese samurai sword.

Buy: $24800
Sell: $12400
Attribute: Piercing
Effects: ATK +25.

Location: Masamune is available from Hammer’s shop.


127) Osafune      
A Japanese sword with the full name of Bizen Osafune Nagamitsu.

Buy: N/A
Sell: $15000
Attribute: Piercing
Effects: ATK +34.

Location: In Yoko’s shop, synthesize Kotetsu with Devil Soul to create Osafune. Another method is by synthesizing Masamune with Barbariccia Soul.


128) Kunitsuna    
Onimaru Kunitsuna, a sword said to have slain Oni demons.

Buy: N/A
Sell: $21000
Attribute: Piercing
Effects: ATK +39.

Location: In Yoko’s shop, synthesize Osafune with Malachi Soul to create Kunitsuna.


129) Yasutsuna    
Doujikiri Yasutsuna a sword said to have cut off a demon's arm.

Buy: N/A
Sell: $29000
Attribute: Piercing
Effects: ATK +48.

Location: In Yoko’s shop, synthesize Kunitsuna with Gaibon Soul to create Yasutsuna.


130) Muramasa      
A sword with a macabre reputation.

Buy: N/A
Sell: $49000
Attribute: Piercing
Effects: ATK +59.

Location: In Yoko’s shop, synthesize Yasutsuna with Malacoda Soul to create Muramasa.

Castlevania: Dawn of Sorrow

Guns and Throwing Weapons

131) Hand Gun      
Fires 9mm rounds.

Buy: $12000
Sell: $6000
Attribute: Piercing
Effects: ATK +9.

Location: From the Garden of Madness upper Save Room, head left, up, 2 rooms left, upper right, right, bottom right and 2 rooms down. You’ll end up in a tight horizontal room. The Hand Gun is on the rightmost corner.

Hand Gun is also available from Hammer’s shop.


132) Silver Gun    
Shoots silver bullets that have been ritually blessed.

Buy: $50000
Sell: $25000
Attribute: Piercing, Holy
Effects: ATK +20.

Location: Silver Gun is available from Hammer’s shop.


133) Boomerang    
A throwing weapon with a curved blade.

Buy: $1500
Sell: $750
Attribute: Piercing
Effects: ATK +3.

Location: Boomerang is available from Hammer’s shop and an item drop of Skelerang.


134) Chakram      
A throwing weapon with a sharp, circular blade.

Buy: N/A
Sell: $1500
Attribute: Piercing
Effects: ATK +10.

Location: Chakram is an item drop of Amalaric Archer.


135) Tomahawk      
A battle axe designed for throwing.

Buy: $7000
Sell: $3500
Attribute: Piercing
Effects: ATK +14.

Location: Tomahawk is available from Hammer’s shop and an item drop of Great Axe Armor.


136) Throwing Sickle
A small throwing sickle used by ninjas.

Buy: $9000
Sell: $4500
Attribute: Piercing
Effects: ATK +20.

Location: Throwing Sickle is available from Hammer’s shop.


Miscellaneous Weapons

137)  Nunchaku      
Only a true master can wield a weapon this deadly.

Buy: N/A
Sell: N/A
Attribute: Blunt
Effects: ATK +30

Location: Complete Boss Rush Mode in under 7 minutes.


138) Whip          

Buy: N/A
Sell: N/A
Attribute: Blunt
Effects: ATK +56

Location: Unlock with Succubus glitch.


139) Terror Bear  
An insidious stuffed toy filled with iron sand.

Buy: N/A
Sell: N/A
Attribute: Blunt
Effects: N/A

Location: Complete Boss Rush Mode in under 8 minutes.


140) RPG          
Rocket-propelled grenade.

Buy: N/A
Sell: N/A
Attribute: Fire
Effects: ATK +82

Location: Complete the Boss Rush Mode in under 5 minutes.


V - Armors

Clothes

141) Casual Clothes
Clothes worn regularly.

Buy: N/A
Sell: $100
Effects: DEF +3.
Location: Soma has it from the start of the game.


142) Cloth Tunic  
A simple garment made of cloth.

Buy: $300
Sell: $150
Effects: DEF +4.

Location: Cloth Tunic is available from Hammer’s shop and an item drop of Zombie.


143) Gym Clothes  
An athletic training suit.

Buy: $1000
Sell: $500
Effects: DEF +8 and CON +2.

Location: Gym Clothes is available from Hammer’s shop and an item drop of Slaughterer.


144) Kung Fu Suit
Looks like it can make you stronger.

Buy: N/A
Sell: $1000
Effects: DEF +4.

Location: Kung Fu Suit is an item drop of Fleaman.


145) Biker Jacket  
A leather jacket worn by motorcyclists.

Buy: N/A
Sell: $1200
Effects: DEF +13 and STR +2.

Location: Biker Jacket is an item drop of Quetzalcoatl.

Castlevania: Dawn of Sorrow

146) War Fatigues  
Sturdy clothes made for military use.

Buy: N/A
Sell: $1600
Effects: DEF +15 and STR +3.

Location: From the Warp Room of Demon Guest House, head 2 rooms right, 3 rooms left and up. You’ll end up in a room full of breakable blocks. War Fatigues is on the top left ledge.


147) Ninja Suit     |
A ninja's combat garment.

Buy: N/A
Sell: $2500
Effects: DEF +18, STR +2 and CON +2.

Location: From the Garden of Madness upper Save Room, head 3 rooms left. You’ll end up in a room with 2 Skeleton Apes and Corpseweed just near where you came out. There’s a breakable ceiling in the right portion of that room. The Ninja Suit is inside the hidden room above.


148) Three 7s      
Clothes that summon luck.

Buy: N/A
Sell: $3885
Effects: DEF +3, CON +7, INT +7 and LCK +7.

Location: From the lower Save Room of the Dark Chapel, head 3 rooms left and down. You’ll end up in a vertical room with a gold statue on the middle right corner. Make sure that your gold has a “777” on its last three digits. To check your current gold go to the main menu and find the “GOLD” section. Then, go closer to the golden statue and it will start to move and revealing a hidden passage. The Three 7s is inside that hidden room.

Three 7s is also an item drop of Killer Clown.


149) Justaucorps  
A luxurious suit with fine detailing throughout.

Buy: N/A
Sell: $6440
Effects: DEF +19, STR +1 and INT +1.

Location: From the rightmost Save Room of Demon Guest House, head 2 rooms left. You’ll end up in the control room of puzzle piece’s area. Justaucorps is inside room number “9”.


150) Army Jacket  
A jacket woven with special fabric that resists cuts.

Buy: N/A
Sell: $7500
Effects: DEF +44.

Location: From the bottom Save Room of Cursed Clock Tower, head right, middle right, right and 5 rooms left. The Army Jacket is on the pipe of a small room, just after the huge room which is full of rotating cog wheels.


Previous | 1 | 2 | 3 | 4 | Next

Item List 2 of 4

Item List
Castlevania: Dawn of Sorrow

51) UMA News 2-2  
Another issue in the UMA News series.

Buy: N/A
Sell: $50
Effects: Reveals some information about Mothman.

Location: From the upper Save Room of Demon Guest House, head left, down and upper right.


52) UMA News 2-3  
Another issue in the UMA News series.

Buy: N/A
Sell: $50
Effects: Reveals some information about Mothman.

Location: From the bottom portion of Condemned Tower, head to the fourth leftmost vertical room. You’ll end up in a room where 2 Buers roam the place. UMA News 2-3 is on the top leftmost ledge.


53) UMA News 2-4  
Another issue in the UMA News series.

Buy: N/A
Sell: $50
Effects: Reveals some information about Mothman.

Location: From the Warp Room of Demon Guest House, head 2 rooms right, 3 rooms left and up. You’ll end up in a room full of breakable blocks. UMA News 2-4 is on the top right ledge.


54) UMA News 3-1  
Another issue in the UMA News series.

Buy: $100
Sell: $50
Effects: Reveals some information about Flying Humanoid.

Location: UMA News 3-1 is available from Hammer’s shop.


55) UMA News 3-2  
Another issue in the UMA News series.

Buy: N/A
Sell: $50
Effects: Reveals some information about Flying Humanoid.

Location: From the Warp Room of Dark Chapel, head right and middle right. You’ll end up in a very huge, open-air area. UMA News 3-2 is on the middle left platform.


56) UMA News 3-3  
Another issue in the UMA News series.

Buy: N/A
Sell: $50
Effects: Reveals some information about Flying Humanoid.

Location: From the top Save Room of the Cursed Clock Tower, head left, down right, left and right. You’ll end up in a room full of cog wheels and spikes. UMA News 3-3 is on the bottom left pipe.


57) UMA News 4    
Final issue of the UMA News series.

Buy: N/A
Sell: $50
Effects: Collectible item.

Location: From the Wizardry Lab Warp Room, head left, middle left and 2 rooms left. You’ll end up in a room divided by a wall which control switch is on the other side. UMA News 4 is just beside the switch.


Key

58) Tower Key  
Oddly shaped key.

Buy: N/A
Sell: N/A
Effects: Used to unlock the sealed door of Condemned Tower.

Location: Found just outside the Warp Room of Condemned Tower.


Bonus Items

59) Konami Man  
5000 points.

Buy: N/A
Sell: $5000
Effects: Collectible item.

Location: From the top Save Room of Cursed Clock Tower, head left, down, right and left. You’ll end up in a room full of spikes, where a Slime and a Tanjelly roam the place. Kneel in the middle floating platform and wait a little while until Konami Man shows up.


60) Crown  
5000 points.

Buy: N/A
Sell: $5000
Effects: Collectible item.

Location: From the rightmost Save Room of Demon Guest House, head left, up and bottom right. You’ll end up in a small bedroom with a Skeleton Waiter. Sit on the chair beside the bed and don’t move until a treasure chest emerges from the floor.


61) Bell    
5000 points.

Buy: N/A
Sell: $5000
Effects: Collectible item.

Location: From the upper Save Room of Dark Chapel, head right, top right and another right. You’ll end up in a room where you can find three huge bells. Jump inside the left bell’s hole using the Hippogryph skill (Up + L button).


IV - Weapons

Knives

62) Knife  
A cheap pocket knife. It cuts poorly.

Buy: $200
Sell: $100
Attribute: Piercing
Effects: ATK +3.

Location: Knife is available from Hammer’s shop.    


63) Combat Knife
A military-issue combat knife.

Buy: N/A
Sell: $2500
Attribute: Piercing
Effects: ATK +6.

Location: From the upper Save Room of Wizardry Lab, head left, top left, left and right. You’ll end up in a room with a big mirror. The Baselard is just next to the mirror.


64) Baselard  
A short sword with an I-shaped shaft.

Buy: $12800
Sell: $6400
Attribute: Piercing
Effects: ATK +9.

Location: Baselard is available from Hammer’s shop.


65) Cutall    
A short sword of East Indian origin.

Buy: N/A
Sell: $9000
Attribute: Piercing
Effects: ATK +11.

Location: From the rightmost Save Room of Demon Guest House, head 2 rooms left. You’ll end up in the control room of puzzle piece’s area. Baselard is inside room number “5”.

Castlevania: Dawn of Sorrow

66) Cinquedia    
A bejeweled short sword featuring elaborate ornamentation.

Buy: $32800
Sell: $16400
Attribute: Piercing
Effects: ATK +17.

Location: Cinquedia is available from Hammer’s shop.


Rapiers

67) Rapier        
A thrusting sword with a tapered blade.

Buy: $480
Sell: $240
Attribute: Piercing
Effects: ATK +11.

Location: Rapier is available from Hammer’s shop.


68) Fleuret      
A small sword.

Buy: N/A
Sell: $1440
Attribute: Piercing
Effects: ATK +14.

Location: From the upper Save Room of Garden of Madness, head 3 rooms left and down. You’ll end up in a tight horizontal room where there’s a treasure chest at the farthest left corner. Fleuret is on the ledge just above that treasure chest.


69) Main Gauche  
A sword designed for superior defense.

Buy: $5280
Sell: $2640
Attribute: Piercing
Effects: ATK +17 and DEF +3.

Location: Main Gauche is available from Hammer’s shop.


70) Small Sword  
A light and easy-to-handle sword.

Buy: N/A
Sell: $400
Attribute: Piercing
Effects: ATK +20.

Location: From the bottom Save Room of Garden of Madness, head 2 rooms right and middle right. You’ll end up in a small room where there’s a Treant guarding the place. The Small Sword is on the ledge at the rightmost corner.


71) Estoc        
A sword made for stabbing.

Buy: N/A
Sell: $6600
Attribute: Piercing
Effects: ATK +23.

Location: From the bottom portion of Condemned Tower, head to the third leftmost vertical room. You’ll end up in an area where a Skeleton Ape and a Great Axe Armor roam the place. Estoc is on the top right ledge.


72) Whip Sword
A sword with a whip-like blade.

Buy: N/A
Sell: $8000
Attribute: Piercing
Effects: ATK +25.

Location: In Yoko’s shop, synthesize either Main Gauche, Estoc or Small Sword with White Dragon Soul to create Whip Sword.


73) Garian Sword  
A flexible, articulate sword made for executions.

Buy: N/A
Sell: $12000
Attribute: Piercing
Effects: ATK +28.

Location: In Yoko’s shop, synthesize Whip Sword with Quetzalcoatl Soul to create Garian Sword.


74) Kris Naga    
A beautifully decorated sword made of damask.

Buy: $32000
Sell: $16000
Attribute: Piercing
Effects: ATK +31.

Location: Kris Naga is available from Hammer’s shop.


75) Nebula        
A holy chain with a will of its own.

Buy: N/A
Sell: $20000
Attribute: Piercing, Holy
Effects: ATK +37.

Location: In Yoko’s shop, synthesize Garian Sword with Malacoda Soul to create Nebula.


Swords

76) Short Sword  
A sword with a stubby blade.

Buy: $800
Sell: $4400
Attribute: Piercing
Effects: ATK +9.

Location: Found just outside the first Save Room of the Lost Village.

Short Sword is also available from Hammer’s shop.


77) Cutlass      
A sword used by cavalry riders.

Buy: $5800
Sell: $2900
Attribute: Piercing
Effects: ATK +14.

Location: Cutlass is available from Hammer’s shop. In Yoko’s shop, synthesize Short Sword with Armor Knight Soul to create Cutlass.


78)Long Sword  
A common type of sword.

Buy: $11800
Sell: $5900
Attribute: Piercing
Effects: ATK +17.

Location: Found in the room just outside the lower Save Room of Dark Chapel. The Long Sword is on the upper left ledge.

Long Sword is also available from Hammer’s shop. In Yoko’s shop, synthesize Cutlass with Corpseweed Soul to create Long Sword.


79) Fragarach    
A demonic sword in the shape of a cross.

Buy: N/A
Sell: $9000
Attribute: Piercing, Dark
Effects: ATK +23.

Location: From the top Save Room of the Pinnacle, head right, up and 2 rooms left. You’ll end up in a small room before Dario’s (boss) place. Above that room is a breakable ceiling that can be accessed by either Bat Company or Hippogryph (Up + L button). The Fragarach is inside the hidden room above.

In Yoko’s Shop, synthesize Long Sword with Great Armor Soul to create Fragarach.

80) Hrunting      
A frightening sword that contains venom in its blade.

Buy: N/A
Sell: $12000
Attribute: Piercing, Poison
Effects: ATK +25.

Location: In Yoko’s shop, synthesize Fragarach with Mollusca Soul to create Hrunting.

Castlevania: Dawn of Sorrow

81) Mystletain  
A sword hewn from the wood of a divine tree.

Buy: N/A
Sell: $14000
Attribute: Piercing, Holy
Effects: ATK +20.

Location: In Yoko’s shop, synthesize Fragarach with Treant Soul to create Mystletain.


82) Joyeuse      
An extravagantly beautiful sword. Quite valuable.

Buy: N/A
Sell: $25000
Attribute: Piercing
Effects: ATK +28 and LCK +5.

Location: In Yoko’s shop, synthesize either Hrunting or Mystletain with Killer Clown Soul to create Joyeuse.


83) Milican's Sword
A sword that may petrify the target.

Buy: N/A
Sell: $15000
Attribute: Piercing, Petrify
Effects: Has a chance to petrify enemies.

Location: In Yoko’s shop, synthesize Joyeuse with Catoblepas Soul to create Milican’s Sword.


84) Ice Brand    
A demonic sword that freezes all that it touches.

Buy: N/A
Sell: $16000
Attribute: Piercing, Ice
Effects: ATK +34 and INT +5. Releases icicles that add elemental damage.

Location: In Yoko’s shop, synthesize Joyeuse with Frozen Shade Soul to create Ice Brand.


85) Laevatain    
An intensely hot sword that scorches everything it touches.

Buy: N/A
Sell: $16000
Attribute: Piercing, Fire
Effects: ATK +17 and INT +5. Releases flames that add elemental damage.

Location: In Yoko’s shop, synthesize Joyeuse with Ukoback Soul to create Laevatain.


86) Burtgang      
A sword blessed with divinity. It is designed for defense first.

Buy: N/A
Sell: $24000
Attribute: Piercing
Effects: ATK +39, DEF +13 and CON +10.

Location: In Yoko’s shop, synthesize either Milican’s Sword, Ice Brand or Laevatain with Iron Golem Soul to create Burtgang.


87) Kaladbolg    
A demonic sword tempered by fairies.

Buy: N/A
Sell: $26000
Attribute: Piercing, Dark
Effects: ATK +45 and INT +8.

Location: In Yoko’s shop, synthesize Burtgang with Arc Demon Soul to create Kaladbolg.


88) Valmanway    
A sword whose name means "Blessed Wind."

Buy: N/A
Sell: $44000
Attribute: Piercing
Effects: ATK +25.

Location: In Yoko’s shop, synthesize Kaladbolg and Abaddon Soul to create Valmanway.


89) Alucard Sword

Buy: N/A
Sell: N/A
Attribute: Piercing, Holy
Effects: ATK +37.

Location: Can be unlock with Succubus glitch.


Great Swords

90) Claymore    
A heavy, two-handed sword.

Buy: $1200
Sell: $600
Attribute: Piercing
Effects: ATK +20.

Location: From the first Save Room of the Lost Village, head 3 rooms left.

Claymore is also available from Hammer’s shop.


91) Falchion    
A sword with a wide, crescent blade used by Normans.

Buy: $8000
Sell: $4000
Attribute: Piercing
Effects: ATK +25.

Location: Falchion is available from Hammer’s shop and an item drop of Dead Pirate. In Yoko’s shop, synthesize Claymore with Warg Soul to create Falchion.


92) Great Sword  
A massive sword that is made to smash through its targets.

Buy: N/A
Sell: $6000
Attribute: Piercing
Effects: ATK +34.

Location: From the rightmost Save Room of Demon Guest House, head 2 rooms left. You’ll end up in the control room of puzzle piece’s area. Great Sword is inside room number “12”.

In Yoko’s shop, synthesize Falchion with Great Armor Soul to create Great Sword.


93) Durandal      
A sword of giants that was tempered by fairies.

Buy: N/A
Sell: $9500
Attribute: Piercing
Effects: ATK +42.

Location: From the Save Room of the Pinnacle, head left, up, left and up. You’ll end up in a very huge open-air area. In the middle left of that area is a breakable wall that opens a hidden passage. The Durandal is inside that hidden room.

In Yoko’s shop, synthesize Great Sword with Valkyrie Soul to create Durandal.


94) Dainslef      
A demonic sword of finality.

Buy: N/A
Sell: $15000
Attribute: Piercing, Dark
Effects: ATK +56, DEF +3, STR +6, CON +6 and INT +6.

Location: In Yoko’s shop, synthesize Durandal with Lilith Soul to create Dainslef.


95) Ascalon
A dragon-slaying sword.

Buy: N/A
Sell: $21000
Attribute: Piercing
Effects: ATK +56.

Location: In Yoko’s shop, synthesize Dainslef with Draghignazzo Soul to create Ascalon.

Castlevania: Dawn of Sorrow

96) Balmung
A demonic dragon-slaying sword.

Buy: N/A
Sell: $25000
Attribute: Piercing, Dark
Effects: ATK +65.

Location: In Yoko’s shop, synthesize Ascalon with Gergoth Soul to create Balmung.


97) Final Sword  
A sword taken from a Final Guard.

Buy: N/A
Sell: $36000
Attribute: Piercing
Effects: ATK +76.

Location: In Yoko’s shop, synthesize Balmung with Final Guard Soul to create Final Sword.


98) Claimh Solais
An indefatigable sword. Its blade glitters with light.

Buy: N/A
Sell: $50000
Attribute: Piercing, Holy
Effects: ATK +84.

Location: In Yoko’s shop, synthesize Final Sword with Alastor Soul to create Claimh Solais.


Hammers

99) Mace        
A large club.

Buy: $800
Sell: $400
Attribute: Blunt
Effects: ATK +23.

Location: Found just outside the Save Room above Yoko’s synthesis room, on the upper floor where an Ouija Table is located.

Mace is also available from Hammer’s shop.


100) Morgenstern  
A club with a star-shaped head. A brutal weapon.

Buy: N/A
Sell: $5000
Attribute: Blunt
Effects: ATK +34.

Location: In Yoko’s shop, synthesize Mace with Needles Soul to create Morgenstern.


Previous | 1 | 2 | 3 | 4 | Next

Item List 1 of 4

Item List
Castlevania: Dawn of Sorrow

I - Potions and Foods

Potions

1) Potion        
Restores 100 HP.    

Buy: $300
Sell: $150
Effects: Restores 100 HP.

Location: There is a Potion outside the first Save Room of the Lost Village.

The next one is still from the Lost Village, from Hammer’s item shop, head left, exit to middle right and another right. You’ll end up in a huge room. The Potion on the middle right corner.

Another Potion is found just outside the Warp Room of Dark Chapel, located on the top rightmost ledge of the huge room.

The fourth Potion is found in Subterranean Hell. From the Warp Room head 4 rooms right. You’ll end up in a vertical room that has a lever on its floor. Smash the lever with any hammer to reveal the 3 hidden items. The stronger the hammer the more items can be unlocked. The Potion is the first bonus item, which requires at least the weakest hammer (Mace).

Potion is also available from Hammer’s shop.


2) High Potion  
Restores 200 HP.  

Buy: $1000
Sell: $500
Effects: Restores 200 HP.

Location: From the Warp Room of Dark Chapel, head right and middle right. You’ll end up in a very huge, open-air area. The High Potion on the middle right ledge.

Another High Potion is found in Subterranean Hell. From the Warp Room head 4 rooms right. You’ll end up in a vertical room that has a lever on its floor. Smash the lever with any hammer to reveal the 3 hidden items. The stronger the hammer the more items can be unlocked. The High Potion is the second bonus item, which requires at least the second powerful hammer (Morgenstern).

The last High Potion is found in Lost Village. From the first Save Room, head left and top left. You’ll end up in a huge open-air area. The High Potion is on the top leftmost platform.

High Potion is also available from Hammer’s shop.

3) Super Potion  
Restores all HP.        
    
Buy: N/A
Sell: $2500
Effects: Restores 100 HP.

Location: From the Warp Room of Demon Guest House, head right, bottom right and down. The Super Potion is on the upper right corner of the platform.

Another one is found in Subterranean Hell. From the Warp Room head 4 rooms right. You’ll end up in a vertical room that has a lever on its floor. Smash the lever with any hammer to reveal the 3 bonus items. The stronger the hammer the more items can be unlocked. The Super Potion is the last bonus item, which requires the most powerful hammer (Mjollnjr).

The third Super Potion is found in another part of Subterranean Hell. From the bottom Save Room, head 2 rooms left, bottom left, and 5 rooms left. You’ll end up in a place where the Homunculi are made. The Super Potion is on the bottom mid floor.

The last Super Potion is found in Silenced Ruins. From the Warp Room, head 2 rooms left, up and top left. You’ll end up in a small room with a big mirror in the middle. Enter the mirror using the Paranoia soul to acquire the Super Potion inside.

Super Potion is also an item drop of Final Guard.


4) Mind Up      
Restores 100 MP.

Buy: $400
Sell: $200
Effects: Restores 100 HP.

Location: There is a Mind Up just outside the first Save Room of Wizardry Lab.

Another one is located in the lower area of Condemned Tower. Located just 1 room left from the place where a dark energy is flowing on the floor and where Julius used the Belmonts’ “Grand Cross” skill to break it.

Mind Up is also available from Hammer’s shop and an  item drop of Devil.


5)  High Mind Up  
Restores 200 MP.

Buy: $1200
Sell: $600
Effects: Restores 200 HP.

Location: From the rightmost Save Room of Demon Guest House, head left and down. The High Mind Up is just beside the tight passage where a puppet can pass through.

Another one is found in the Dark Chapel. From the upper Save Room head right, top right and another right. You’ll end up in a room where you can find three huge bells. The High Mind Up is on the middle right ledge of that room.

The last one is on Subterranean Hell’s very huge underwater area. From the topmost Save Room, head left, 3 rooms right and down. The High Mind Up is on the middle left ledge.

High Mind Up is  also available from Hammer’s shop and an item drop of Malachi.


6) Mana Prism    
Restores all MP.

Buy: N/A
Sell: $1500
Effects: Fully increases MP.

Location: From the Warp Room of Demon Guest House, head 4 rooms right, up, middle left and 2 rooms left.  You’ll end up in a room with a big mirror. Enter the mirror using the Paranoia soul to get the Mana Prism inside.

Another one is found in the Silenced Ruins. From the Warp Room, head 2 rooms left, up and top left. You’ll  end up in a small room with a big mirror in the middle. The Mana Prism is just next to that mirror.

The third one is found in the Pinnacle. From the Save Room, head left, up, left, up and right. You’ll end up in a huge room where there are 2 Guillotiners, Mushussu and Alastor that guards the place. The Mana Prism  is on the middle platform.

Mana Prism is also an item drop of Arc Demon and Stolas.


7) Anti-Venom    
Cures poison.

Buy: $100
Sell: $50
Effects: Removes poison.

Location: From the upper Save Room of Dark Chapel, head right, top right and another right. You’ll end up in a room where you can find three huge bells. The Anti-Venom is on the top left ledge.

Anti-Venom is also available from Hammer’s shop and an item drop of Mollusca.


8) Uncurse Potion
Nullifies the effect of curses.

Buy: $100
Sell: $50
Effects: Removes curse.

Location: Uncurse Potion is available from Hammer’s shop.


Foods

9) Meat Strip    
Restores 29 HP.

Buy: N/A
Sell: $145
Effects: Restores 29 HP.

Location: Meat Strip is an item drop of Catoblepas and Needles.


10) Tasty Meat    
Restores 290 HP.

Buy: N/A
Sell: $200
Effects: Restores 290 HP.

Location: From the Warp Room of Dark Chapel, head right, middle right and 3 rooms right. You’ll end up in an area where a Draghignazzo is flying around. Tasty Meat is on the top right platform. Use Bat Company or Hippogryph (Up + L Button) to reach the item.

Tasty Meat is also an item drop of Gorgon.


11) Rice Ball    
Simple. But still, very tasty.

Buy: N/A
Sell: $50
Effects: Restores 50 HP.

Location: Rice Ball is an item drop of Dead Warrior.


12) Mushroom      
Delicious and appetizing mushroom.

Buy: N/A
Sell: $95
Effects: Restores 100 HP.

Location: From the Warp Room of Subterranean Hell, head right and down. The Mushroom is on the top leftmost corner.

There are another Mushrooms in another part of Subterranean Hell. From the bottom Save Room, head 2 rooms left. You’ll end up in a huge waterfall area where Medusa’s Head, Mermen and Dead Pirates roam the place. One of the Mushroom is on the bottom right platform and the other one is on the middle right corner.


13) Corn Soup    
A creamy soup with croutons.

Buy: N/A
Sell: $75
Effects: Restores 80 HP.

Location: From Hammer’s item shop, head left, middle right, right and bottom right. You’ll end up in a room with a bunch of Zombies. There is a breakable floor in the right corner. The Corn Soup is inside the hidden room below.


14) Beef Curry    
Mouth-watering food.

Buy: N/A
Sell: $690
Effects: Restores 500 HP.

Location: Beef Curry is an item drop of Waiter Skeleton.


15) Noodles      
Noodles floating in pork broth.

Buy: N/A
Sell: $400
Effects: Restores 300 HP.

Location: Noodles is an item drop of Heart Eater.

Castlevania: Dawn of Sorrow

16)Cream Soda    
Topped with a red cherry.

Buy: N/A
Sell: $200
Effects: Restores 100 HP.

Location: Cream Soda is an item drop of Witch.


17) Cream Puff    
Soft, sweet and even fluffy.

Buy: N/A
Sell: $60
Effects: Restores 80 HP.

Location: Cream Puff is an item drop of Student Witch.


18) Milk          
Low-fat milk. Good for your bones, kiddie!

Buy: N/A
Sell: $74
Effects: Restores 60 HP.

Location: Milk is an item drop of Catoblepas and Gorgon.


19) Coffee        
Decaf coffee!    

Buy: N/A
Sell: $175
Effects: Restores 100 HP.

Location: Coffee is an item drop of Lilith.


20)  Tea          
Sip slowly and relax.

Buy: N/A
Sell: $100
Effects: Restores 80 HP.

Location: Tea is an item drop of Ghost Dancer.


21) Pudding      
This one wiggles and jiggles!

Buy: N/A
Sell: $75
Effects: Restores 100 HP.

Location: Pudding is an item drop of Dead Mate.


22) Strawberry    
A plump and sweet berry.

Buy: N/A
Sell: $265
Effects: Restores 150 HP.

Location: Strawberry is an item drop of Persephone.


23) Melon        
Melon of finest quality.

Buy: N/A
Sell: $750
Effects: Restores 300 HP.

Location: Melon is an item drop of Erinys.


24) Grapes        
Bursting with flavorful juice.

Buy: N/A
Sell: $190
Effects: Restores 60 HP.

Location: Grapes is an item drop of Alura Une.


25) Hamburger    
Made of fried meat. Sandwiched in pieces of bread.

Buy: N/A
Sell: $50
Effects: Restores 30 HP.

Location: Hamburger is an item drop of Killer Clown.


26) Fried Chicken  
Crispy, fried chicken.

Buy: N/A
Sell: $200
Effects: Restores 129 HP.

Location: Fried Chicken is an item drop of Rycuda.


27) Hot Dog      
The king of junk food.

Buy: N/A
Sell: $50
Effects: Restores 60 HP.

Location: Hot Dog is an item drop of Hell Boar.


28) Pumpkin Pie  
Sweet and delicious!  

Buy: N/A
Sell: $50
Effects: Restores 60 HP.

Location: From the first Save Room of Lost Village, head left, top left, left and top left. You’ll end up in a small dining room. The Pumpkin Pie is just beside the table.


29) Pancake      
It's nothing without maple syrup!    

Buy: N/A
Sell: $50
Effects: Restores 70 HP.

Location: Pancake is an item drop of Valkyrie.


30) Piroshki      
Russian meat dumpling.      

Buy: N/A
Sell: $50
Effects: Restores 50 HP.

Location: Piroshki is an item drop of Slaughterer.

Castlevania: Dawn of Sorrow

31) Tinned Spinach
May give the illusion of bulking up muscle mass.

Buy: N/A
Sell: $50
Effects: Restores 40 HP.

Location: Tinned Spinach is an item drop of the Creature.


32) Foie Gras    
Rare liver paste of duck liver.          

Buy: N/A
Sell: $1500
Effects: Restores 1000 HP.

Location: From the Warp Room of Wizardry Lab, head left, top right and right. You’ll end up in a horizontal room with floating platform, breakable blocks and a bunch of Armor Knights that roam the place. In the middle is a breakable ceiling. The Foie Gras is inside the hidden room above.


33) Caviar        
Rare sturgeon eggs.      

Buy: N/A
Sell: $1500
Effects: Restores 1000 HP.

Location: From Yoko’s synthesis room of Lost Village, head right, down and right. You’ll end up in an underground room full of Axe Armors and a Great Axe Armor. The Caviar is on the leftmost corner.


34) Truffle      
A rare black mushroom.

Buy: N/A
Sell: $1500
Effects: Restores 1000 HP.

Location: From the Warp Room of the Pinnacle, just head right. You’ll end up in an open-air area where a Dead Warrior and Erinys roam the place. There’s a breakable floor on the bottom left. The Truffle is inside the hidden room below.


35) Paella        
A veritable cornucopia of seafood.

Buy: N/A
Sell: $400
Effects: Restores 120 HP.

Location: Paella is an item drop of Cave Troll.


36) Spaghetti    
Served al dente.

Buy: N/A
Sell: $475
Effects: Restores 150 HP.

Location: Spaghetti is an item drop of Manticore and Mushussu.


37) Ice Cream    
Vanilla ice loaded with egg yolks.

Buy: N/A
Sell: $50
Effects: Restores 50 HP.

Location: Ice Cream is an item drop of Frozen Shade.


38) Salmon Meuniere
Seafood dish seasoned with curry.

Buy: N/A
Sell: $500
Effects: Restores 120 HP.

Location: Salmon Meuniere is an item drop of Killer Fish.


39) Boiled Starfish
Has a firm, jelly-like texture.

Buy: N/A
Sell: $200
Effects: Restores 120 HP.

Location: Boiled Starfish is an item drop of Decarabia.


40) Amanita      
Toxic mushroom.

Buy: N/A
Sell: $0
Effects: Depletes 100 HP.

Location: From the bottom Save Room of Mediterranean Hell, head 2 rooms left. You’ll end up in a very huge waterfall area where Medusa’s Head, Mermen and Dead Pirates roam the place. The Amanita is on the middle right platform.

Amanita is also an item drop of Wakwak Tree.


41) Rotten Meat  
A slab of rotting meat.

Buy: N/A
Sell: $0
Effects: Depletes 200 HP.

Location: Rotten Meat is an item drop of Ghoul.


42) Spoiled Milk  
Expired three years ago.

Buy: N/A
Sell: $0
Effects: Depletes 400 HP.

Location: Spoiled Milk is an item drop of Hell Boar.


43) Rusty Food Tin
Are you brave enough to open it? Don't!

Buy: N/A
Sell: $0
Effects: Depletes 600 HP.

Location: From the topmost Save Room of Subterranean Hell, head left, 3 rooms right and down. You’ll end up in a very huge underwater area which is full of Fish Heads and Needles. Rusty Food Tin is on the bottom right corner of that place.

Rusty Food Tin is also an item drop of Dead Pirate.


III - Key Items

Castle Maps

44) CASTLE MAP 1  
Reveals parts of the castle.

Buy: $100
Sell: $50
Effects: Reveals some rooms of the castle.

Location: Castle Map 1 is available from Hammer’s shop.


45) CASTLE MAP 2  
Reveals parts of the castle.

Buy: $100
Sell: $50
Effects: Reveals some rooms of the castle.

Location: Castle Map 2 is available from Hammer’s shop.

Castlevania: Dawn of Sorrow

46) CASTLE MAP 3  
Reveals parts of the castle.

Buy: N/A
Sell: $50
Effects: Reveals some rooms of the castle.

Location: Castle Map 3 is available from Hammer’s shop.


UMA News

47) UMA News 1-1  
First issue of the UMA News series.

Buy: $100
Sell: $50
Effects: Reveals some information about Yeti.

Location: UMA News 1-1 is available from Hammer’s shop.


48) UMA News 1-2  
Another issue in the UMA News series.

Buy: N/A
Sell: $50
Effects: Reveals some information about Yeti.

Location: From the rightmost Save Room of Demon Guest House, head left, up and middle right. You’ll end up in a room where there’s a Demon and Persephone roaming the place. UMA News 1-2 is on the right corner.


49) UMA News 1-3  
Another issue in the UMA News series.

Buy: N/A
Sell: $50
Effects: Reveals some information about Yeti.

Location: Found just outside the middle Save Room of Subterranean Hell. It is a huge area where there are 3 Bone Arcs, Mermen and Frozen Shades roaming around the place. UMA News 1-3 is on the top right platform.


50) UMA News 2-1  
Another issue in the UMA News series.

Buy: $100
Sell: $50
Effects: Reveals some information about Mothman.

Location: UMA News 2-1 is available from Hammer’s shop.


Previous | 1 | 2 | 3 | 4 | Next

Enemy List 2 of 2

Enemy List
Castlevania: Dawn of Sorrow

51) Needles
A giant sea urchin that has been driven close to extinction from over-fishing.

Strength: N/A
Weakness: Piercing, Fire, Lightning
Item 1: Meat Strip
Item 2: N/A
Rarity: 2 Stars
EXP: 10

Location: Subterranean Hell


52) Hell Boar
A boar from hell with exceptional fighting skills.

Strength: Blunt
Weakness: Piercing, Slash, Poison, Petrify
Item 1: Spoiled Milk
Item 2: Hot Dog
Rarity: 2 Stars
EXP: 146

Location: The Lost Village, Dark Chapel


53) Bone Pillar
The skulls of dinosaurs animated by a demonic force.

Strength: Piercing, Dark
Weakness: Blunt, Fire, Holy
Item 1: N/A
Item 2: N/A
Rarity: 3 Stars
EXP: 10

Location: Dark Chapel


54) White Dragon
The fossilized remains of a long-necked dinosaur animated by a demonic force.

Strength: Piercing, Dark
Weakness: Blunt, Fire, Holy
Item 1: N/A
Item 2: N/A
Rarity: 2 Stars
EXP: 150

Location: Dark Chapel, The Abyss


55) Wakwak Tree
A horrifying tree that can produce pods of men.

Strength: Lightning
Weakness: Slash, Fire
Item 1: Amanita
Item 2: N/A
Rarity: 2 Stars
EXP: 190

Location: Garden of Madness


56) Imp
A tiny demon who loves mischief.

Strength: Dark
Weakness: Holy
Item 1: N/A
Item 2: N/A
Rarity: 2 Stars
EXP: 66

Location: Cursed Clock Tower


57) Harpy
A bizarre bird-like creature with the torso of a woman.

Tolerance: Blunt
Weakness: Piercing, Slash, Poison, Petrify
Item 1: N/A
Item 2: N/A
Rarity: 2 Stars
EXP: 120

Location: Cursed Clock Tower


58) Barbariccia
One of the guardians of the dungeons of hell.

Strength: Dark
Weakness: Piercing, Slash, Holy, Curse, Petrify
Item 1: Blunt
Item 2: N/A
Rarity: 3 Stars
EXP: 89

Location: Garden of Madness, Dark Chapel


59) Malachi
A pagan being from ancient times that strikes fear into all in its presence.

Strength: Dark
Weakness: Holy
Item 1: Mind High Up
Item 2: N/A
Rarity: 2 Stars
EXP: 356

Location: Demon Guest House, Cursed Clock Tower, The Pinnacle, The Abyss


60) Cave Troll
A blood-sucking beast that extracts the entrails of cattle with its tongue.

Strength: Blunt
Weakness: Piercing, Slash
Item 1: Paella
Item 2: N/A
Rarity: 1 Star
EXP: 156

Location: Wizardry Lab, Subterranean Hell


61) Larva
A wickedly cruel spirit that inhabits a giant worm.

Strength: Blunt, Piercing, Slash, Dark
Weakness: Holy
Item 1: N/A
Item 2: N/A
Rarity: 2 Stars
EXP: 76

Location: Silenced Ruin


62) Heart Eater
A horrific bug that loves to feed on hearts.

Strength: N/A
Weakness: Piercing, Slash
Item 1: Noodles
Item 2: Heart Pendant
Rarity: 3 Stars
EXP: 102

Location: Wizardry Lab, The Abyss


63) Merman
An aquatic monster that attacks prey near water.

Strength: Water
Weakness: Piercing, Slash, Lightning, Curse, Petrify
Item 1: N/A
Item 2: N/A
Rarity: 1 Star
EXP: 60

Location: Wizardry Lab, Subterranean Hell


64) Fish Head
The skeletal remains of a fish animated by dark power.

Strength: Piercing, Dark
Weakness: Blunt, Fire, Holy
Item 1: N/A
Item 2: N/A
Rarity: 2 Stars
EXP: 15

Location: Subterranean Hell


65) Medusa Head
A monster created in great number from the head of Medusa.

Strength: N/A
Weakness: Piercing, Slash
Item 1: N/A
Item 2: N/A
Rarity: 3 Stars
EXP: 12

Location: Cursed Clock Tower

Castlevania: Dawn of Sorrow

66) Ukoback
An enraged demon whose body is engulfed in flames.

Strength: Fire
Weakness: Piercing, Slash, Water, Petrify
Item 1: N/A
Item 2: N/A
Rarity: 2 Stars
EXP: 98

Location: Subterranean Hell


67) Killer Fish
An ancient, man-eating fish. Rumored to be quite tasty.

Strength: Fire
Weakness: Piercing, Lightning, Petrify
Item 1: N/A
Item 2: Salmon Meuniere
Rarity: 2 Stars
EXP: 156

Location: Wizardry Lab, Subterranean Hell


68) Mimic
It assumes the guise of a treasure chest to lure in unsuspecting victims.

Strength: N/A
Weakness: Piercing, Slash, Curse, Petrify
Item 1: N/A
Item 2: N/A
Rarity: 3 Stars
EXP: 120

Location: Wizardry Lab, Garden of Madness, Demon Guest House, Subterranean Hell


69) Dead Pirate
A zombie pirate cursed by its own greed.

Strength: Dark
Weakness: Piercing, Slash, Curse, Petrify
Item 1: Rusty Food Tin
Item 2: Falchion
Rarity: 2 Stars
EXP: 180

Location: Cursed Clock Tower, Subterranean Hell


70) Frozen Shade
A wraith that manipulates frigid air.

Strength: Water, Dark
Weakness: Fire, Holy, Petrify
Item 1: Ice Cream
Item 2: Aquarius
Rarity: 2 Stars
EXP: 190

Location: Subterranean Hell, The Abyss


71) Homunculus
A malevolent, artificial life form created by a demonic scholar.

Strength: Water
Weakness: Piercing, Slash
Item 1: N/A
Item 2: N/A
Rarity: 1 Star
EXP: 177

Location: Wizardry Lab


72) Disc Armor
An armor-clad soldier that is an expert at throwing giant circular blades.

Tolerance: Blunt, Lightning
Weakness: Fire, Water
Item 1: Scale Mail
Item 2: N/A
Rarity: 2 Stars
EXP: 160

Location: Condemned Tower


73) Decarabia
A demon in the shape of a starfish.

Strength: Blunt
Weakness: Piercing, Slash
Item 1: Boiled Starfish
Item 2: N/A
Rarity: 1 Star
EXP: 140

Location: Subterranean Hell


74) Dead Mate
A zombie that protects graveyards together with its beloved dog.

Strength: Dark
Weakness: Piercing, Slash, Petrify
Item 1: N/A
Item 2: Pudding
Rarity: 1 Star
EXP: 210

Location: Silenced Ruin


75) Bugbear
A single-eyed fiend cloaked in thunderbolts.

Strength: Lightning
Weakness: Piercing, Slash, Petrify
Item 1: N/A
Item 2: N/A
Rarity: 3 Stars
EXP: 180

Location: Cursed Clock Tower, The Pinnacle, Mine of Judgment


76) Procel
A liquid demon that appears on the surface of water.

Strength: Water
Weakness: Fire, Lightning
Item 1: N/A
Item 2: N/A
Rarity: 3 Stars
EXP: 136

Location: Subterranean Hell


77) Bone Ark
A mobile Bone Pillar. It is considered an innovative breakthrough.

Strength: Piercing, Dark
Weakness: Blunt, Fire, Holy
Item 1: N/A
Item 2: N/A
Rarity: 3 Stars
EXP: 80x3

Location: Subterranean Hell, Silenced Ruin


78) Gorgon
A monstrous bull that breathes clouds of toxic gas.

Strength: Poison, Petrify
Weakness: Piercing, Slash
Item 1: Milk
Item 2: Tasty Meat
Rarity: 3 Stars
EXP: 280

Location: Silenced Ruin


79) Alura Une
An Une fattened with copious pools of blood.

Strength: Lightning
Weakness: Slash, Fire
Item 1: Grapes
Item 2: N/A
Rarity: 2 Stars
EXP: 480

Location: Subterranean Hell


80) Great Axe Armor
An armor-clad soldier that mows down its victims with a massive axe.

Strength: Fire, Water
Weakness: Blunt, Lightning
Item 1: Tomahawk
Item 2: Chain Mail
Rarity: 3 Stars
EXP: 300

Location: The Lost Village, Wizardry Lab, Condemned Tower

Castlevania: Dawn of Sorrow

81) Moth Man
Half man, half moth. It appears to be attracted to light.

Strength: N/A
Weakness: Fire, Petrify
Item 1: N/A
Item 2: N/A
Rarity: 1 Star
EXP: 355

Location: The Pinnacle


82) Mushussu
A furious beast from ancient Babylonia.

Strength: Blunt
Weakness: Piercing, Slash, Petrify
Item 1: Spaghetti
Item 2: N/A
Rarity: 2 Stars
EXP: 399

Location: The Pinnacle


83) Dead Crusader
A zombie warrior bearing a sturdy shield.

Strength: Dark
Weakness: Piercing, Slash, Fire, Holy, Petrify
Item 1: Blocking Mail
Item 2: N/A
Rarity: 3 Stars
EXP: 195

Location: Silenced Ruin, The Pinnacle


84) Dead Warrior
A dead knight that seeks to fight for all eternity.

Strength: Dark
Weakness: Piercing, Slash, Fire, Holy, Curse, Petrify
Item 1: Rice Ball
Item 2: Partizan
Rarity: 3 Stars
EXP: 188

Location: The Pinnacle


85) Erinys
The goddess of revenge.

Strength: Holy
Weakness: Piercing, Slash, Dark, Poison
Item 1: Hauberk
Item 2: Melon
Rarity: 3 Stars
EXP: 300

Location: The Pinnacle, The Abyss


86) Succubus
A demon that assumes the form of a beautiful maiden to drain vitality.

Strength: Dark
Weakness: Piercing, Slash, Holy
Item 1: Flame Necklace
Item 2: Pitch Black Suit
Rarity: 2 Stars
EXP: 242

Location: Demon Guest House, The Pinnacle, The Abyss


87) Ripper
A fiend that takes great pleasure in slaughtering people with knives.

Strength: N/A
Weakness: Piercing, Slash, Curse, Petrify
Item 1: N/A
Item 2: Black Cloak
Rarity: 2 Stars
EXP: 80

Location: Mine of Judgment, The Abyss


88) Black Panther
A jet-black beast that runs with great speed.

Strength: Blunt
Weakness: Piercing, Slash
Item 1: N/A
Item 2: N/A
Rarity: 1 Star
EXP: 200

Location: The Abyss


89) Mud Demon
A good-looking demon formed out of dirt.

Strength: Dark
Weakness: Holy
Item 1: N/A
Item 2: N/A
Rarity: 2 Stars
EXP: 198

Location: The Abyss


90) Giant Slug
A gigantic mollusk with an equally huge shell.

Strength: Blunt
Weakness: Fire, Water, Lightning, Dark, Holy
Item 1: N/A
Item 2: N/A
Rarity: 3 Stars
EXP: 330

Location: Mine of Judgment, The Abyss


91) Werewolf
A madman that can transform into a savage wolf.

Strength: Blunt
Weakness: Piercing, Slash, Poison, Petrify
Item 1: N/A
Item 2: Black Belt
Rarity: 2 Stars
EXP: 262

Location: Condemned Tower, The Pinnacle


92) Flame Demon
A fire-wielding demon born in the fiery pits of the underworld.

Strength: Fire, Dark
Weakness: Water, Holy
Item 1: N/A
Item 2: Wyrm Robe
Rarity: 2 Stars
EXP: 444

Location: Guest House, Pinnacle , Abyss


93) Tanjelly
A jelly-like monster that is resistant to physical attacks.

Strength: Blunt
Weakness: Fire, Water, Lightning, Dark, Holy
Item 1: N/A
Item 2: N/A
Rarity: 3 Stars
EXP: 255

Location: The Clock Tower, Mine of Judgment


94) Arc Demon
Uses the powers of darkness to wreak havoc upon the world.

Strength: Dark
Weakness: Holy
Item 1: Mana Prism
Item 2: Demon’s Mail
Rarity: 3 Stars
EXP: 666

Location: The Abyss


95) Gaibon
A fiend that serves the Grim Reaper. It can spit fire while flying.

Strength: Dark
Weakness: Piercing, Slash, Light, Petrify
Item 1: N/A
Item 2: N/A
Rarity: 2 Stars
EXP: 422

Location: Mine of Judgment

Castlevania: Dawn of Sorrow

96) Slogra
A fiend that serves the Grim Reaper. It fights on the ground with a spear.

Strength: Dark
Weakness: Piercing, Slash, Holy, Petrify
Item 1: N/A
Item 2: N/A
Rarity: 1 Star
EXP: 422

Location: Mine of Judgment


97) Stolas
A wise, old creature said to have considerable intelligence.

Strength: Holy
Weakness: Piercing, Slash, Dark, Poison
Item 1: Mana Prism
Item 2: N/A
Rarity: 3 Stars
EXP: 800

Location: The Abyss


98) Final Guard
A powerful armored soldier given the task of guarding the castle's key spots.

Strength: All
Weakness: N/A
Item 1: Super Potion
Item 2: Cuirass
Rarity: 3 Stars
EXP: 1,500

Location: The Pinnacle, The Abyss


99) Malacoda
A long-tailed demon that serves as the head of the dungeon guardians.

Strength: Dark
Weakness: Piercing, Slash, Holy, Petrify
Item 1: Kotetsu
Item 2: N/A
Rarity: 2 Stars
EXP: 333

Location: The Abyss


100) Alastor
A possessed sword driven to seek revenge by the souls of slain soldiers.

Strength: Dark
Weakness: Holy
Item 1: N/A
Item 2: N/A
Rarity: 2 Stars
EXP: 564

Location: The Pinnacle, The Abyss


101) Iron Golem
A golem with an impenetrable durability. It has no known weaknesses.

Strength: All
Weakness: N/A
Item 1: N/A
Item 2: N/A
Rarity: 3 Stars
EXP: 2,000

Location: Wizardry Lab, Demon Guest House, The Abyss


102) Flying Armor
A sinister cape-clad figure that hovers in the air.

Strength: Fire, Water
Weakness: Blunt, Lightning
Item 1: N/A
Item 2: N/A
Rarity: N/A
EXP: 500

Location: The Lost Village


103) Balore
A demon with a fear-inducing gaze.

Strength: N/A
Weakness: Piercing, Slash
Item 1: N/A
Item 2: N/A
Rarity: N/A
EXP: 1,000

Location: Wizardry Lab


104) Malphas
A black demon that is accompanied by crows.

Strength: N/A
Weakness: Holy
Item 1: N/A
Item 2: N/A
Rarity: N/A
EXP: 1,500

Location: Dark Chapel


105) Dmitrii
He can learn the abilities of others. He is one of the dark lord's candidates.

Strength: N/A
Weakness: Piercing, Slash
Item 1: N/A
Item 2: N/A
Rarity: N/A
EXP: 2,000

Location: Dark Chapel


106) Dario
A man with inflammatory powers. He is one of the dark lord's candidates.

Strength: Fire
Weakness: Piercing, Slash, Water
Item 1: N/A
Item 2: N/A
Rarity: N/A
EXP: 2,500

Location: Garden of Madness, The Pinnacle


107) Puppet Master
The cursed king of dolls. It controls dolls and the dimensions.

Strength: N/A
Weakness: Fire
Item 1: N/A
Item 2: N/A
Rarity: N/A
EXP: 3,000

Location: Demon Guest House


108) Rahab
A monster that dominates the seas.

Strength: Water
Weakness: Piercing, Lightning, Holy
Item 1: N/A
Item 2: N/A
Rarity: N/A
EXP: 4,000

Location: Subterranean


109) Gergoth
Imprisoned in solitude long ago, it gradually grew evil and demented.

Strength: N/A
Weakness: Piercing, Slash
Item 1: N/A
Item 2: N/A
Rarity: N/A
EXP: 4,290

Location: Condemned Tower

110) Zephyr
A demon with mastery over time.

Strength: N/A
Weakness: Piercing, Slash
Item 1: N/A
Item 2: N/A
Rarity: N/A
EXP: 5,678

Location: Cursed Clock Tower

Castlevania: Dawn of Sorrow

111) Bat Company
A group of bats that thinks and acts as one.

Strength: N/A
Weakness: Piercing, Fire
Item 1: N/A
Item 2: N/A
Rarity: N/A
EXP: 5,730

Location: Silenced Ruin


112) Paranoia
A foul fiend that nests inside mirrors.

Strength: N/A
Weakness: Piercing, Slash
Item 1: N/A
Item 2: N/A
Rarity: N/A
EXP: 8,000

Location: Demon Guest House


113) Aguni
A being that is the embodiment of fire.

Strength: Fire
Weakness: Water
Item 1: N/A
Item 2: N/A
Rarity: N/A
EXP: 10,000

Location: The Pinnacle


114) Death
Dracula's confidant.

Strength: Fire
Weakness: N/A
Item 1: N/A
Item 2: N/A
Rarity: N/A
EXP: 14,444

Location: Mine of Judgment


115) Abaddon
The master of pestilent locusts from the deep abyss of the underworld.

Strength: Dark
Weakness: Piercing, Slash, Holy
Item 1: N/A
Item 2: N/A
Rarity: N/A
EXP: 12,000

Location: The Abyss


116) Menace
A humongous amalgamation of powerful demons.

Strength: N/A
Weakness: Holy
Item 1: N/A
Item 2: N/A
Rarity: N/A
EXP: 0

Location: The Abyss


Previous | 1 | 2 | Next

Enemy List 1 of 2

Enemy List
Castlevania: Dawn of Sorrow

1) Zombie
A rotting corpse of a villager, animated by magic.

Strength: Dark
Weakness: Piercing, Slash, Fire, Holy, Petrify
Item 1: Cloth Tunic
Item 2: N/A
Rarity: 2 Stars
EXP: 1

Location: The Lost Village


2) Bat
A bloodsucking bat that lurks in the castle.

Strength: N/A
Weakness: Piercing, Slash
Item 1: N/A
Item 2: N/A
Rarity: 2 Stars
EXP: 1

Location: The Lost Village, Silenced Ruin


3) Ghost
A small spirit doomed to wander the castle grounds for all eternity.

Strength: Blunt, Piercing, Slash, Dark
Weakness: Light
Item 1: N/A
Item 2: N/A
Rarity: 3 Stars
EXP: 1

Location: Wizardry Lab


4) Skeleton
A skeletal corpse controlled by magic.

Strength: Piercing, Dark
Weakness: Blunt, Fire, Holy
Item 1: N/A
Item 2: N/A
Rarity: 2 Stars
EXP: 4

Location: The Lost Village, Wizardry Lab, Demon Guest House, Silenced Ruin


5) Ouija Table
An enchanted desk possessed by a spirit summoned in a seance.

Strength: N/A
Weakness: Blunt, Fire
Item 1: N/A
Item 2: N/A
Rarity: 3 Stars
EXP: 4

Location: The Lost Village


6) Peeping Eye
A creature that keeps watch in the castle.

Strength: N/A
Weakness: Piercing, Slash, Petrify
Item 1: N/A
Item 2: N/A
Rarity: 3 Stars
EXP: 8

Location: The Lost Village, Demon Guest House, Silenced Ruin


7) Axe Armor
An armor-clad soldier that is highly skilled with axes.

Strength: Fire, Water
Weakness: Blunt, Lightning
Item 1: Axe
Item 2: Leather Armor
Rarity: 1 Star
Exp: 10

Location: The Lost Village, Demon Guest House


8) Skull Archer
An archer made of bone.

Strength: Piercing, Dark
Weakness: Blunt, Fire, Holy
Item 1: N/A
Item 2: N/A
Rarity: 2 Stars
EXP: 10

Location: Wizardry Lab, Silenced Ruin


9) Warg
A wolf that breathes intense flames.

Strength: Blunt
Weakness: Piercing, Ice, Poison, Curse, Petrify
Item 1: N/A
Item 2: N/A
Rarity: 1 Star
EXP: 12

Location: The Lost Village


10) Spin Devil
An evil blade possessed by a demented demon.

Strength: Dark
Weakness: Holy
Item 1: N/A
Item 2: N/A
Rarity: 1 Star
EXP: 15

Location: The Lost Village


11) Armor Knight
An armor-clad soldier equipped with a deadly spear.

Strength: Fire, Water
Weakness: Blunt, Lightning
Item 1: Spear
Item 2: N/A
Rarity: 2 Stars
EXP: 15

Location: The Lost Village


12) Student Witch
A witch-in-training who is still learning how to cast spells properly.

Strength: N/A
Weakness: Piercing, Ice, Poison, Curse, Petrify
Item 1: Cream Puff
Item 2: N/A
Rarity: 2 Stars
EXP: 18

Location: The Lost Village, Wizardry Lab


13) Slaughterer
A savage man that kills with its bare hands.

Strength: Blunt
Weakness: Piercing, Slash, Poison, Petrify
Item 1: Piroshki
Item 2: Gym Clothes
Rarity: 2 Stars
EXP: 40

Location: Wizardry Lab


14) Bomber Armor
An armor-clad soldier that tosses bombs.

Strength: Fire, Water
Weakness: Blunt, Lightning
Item 1: Breastplate
Item 2: N/A
Rarity: 2 Stars
EXP: 42

Location: Wizardry Lab


15) Golem
A giant clay figure imbued with an artificial life force.

Strength: N/A
Weakness: Blunt
Item 1: N/A
Item 2: N/A
Rarity: 2 Stars
EXP: 50

Location: Wizardry Lab

Castlevania: Dawn of Sorrow

16) Slime
A monster composed of a gel-like substance.

Strength: Blunt
Weakness: Fire, Water, Lightning, Dark, Holy
Item 1: N/A
Item 2: N/A
Rarity: 1 Star
EXP: 35

Location: Wizardry Lab


17) Une
An eerie plant that feeds on blood.

Strength: Lightning
Weakness: Slash, Fire, Petrify
Item 1: N/A
Item 2: N/A
Rarity: 2 Stars
EXP: 12

Location: Garden of Madness , Subterranean Hell


18) Skeleton Ape
A skeletal corpse of an ape that is controlled by magic.

Strength: Piercing, Dark
Weakness: Blunt, Fire, Holy
Item 1: N/A
Item 2: N/A
Rarity: 3 Stars
EXP: 48

Location: The Lost Village, Garden of Madness, Condemned Tower


19) Manticore
A monster with the body of a lion, the wings of a bat, and a scorpion's tail.

Strength: Blunt
Weakness: Piercing, Slash, Petrify
Item 1: Spaghetti
Item 2: N/A
Rarity: 2 Stars
EXP: 90

Location: Wizardry Lab


20) Mollusca
A monstrous mollusk imbued with the castle's dark power.

Strength: Blunt
Weakness: Fire, Water, Lightning, Dark, Holy
Item 1: Antidote
Item 2: N/A
Rarity: 2 Stars
EXP: 80

Location: Garden of Madness


21) Rycuda
A monstrous bird that wields lightning.

Strength: Lightning
Weakness: Blunt, Slash, Petrify
Item 1: Fried Chicken
Item 2: N/A
Rarity: 2 Stars
EXP: 56

Location: Garden of Madness


22) Mandragora
A mythical plant that is said to inflict death to those that uproot it.

Strength: Lightning
Weakness: Slash, Fire
Item 1: N/A
Item 2: N/A
Rarity: 2 Stars
EXP: 50

Location: Garden of Madness


23) Yorick
A skeleton that ceaselessly chases after its own skull.

Tolerance: Piercing, Dark
Weakness: Blunt, Fire, Holy
Item 1: N/A
Item 2: N/A
Rarity: 2 Stars
EXP: 52

Location: Garden of Madness


24) Skeleton Farmer
A skeleton that sows haunted plants.

Strength: Piercing, Dark
Weakness: Blunt, Fire, Holy
Item 1: N/A
Item 2: N/A
Rarity: 3 Stars
EXP: 60

Location: Garden of Madness


25) The Creature
A humanoid creature constructed from numerous corpses.

Strength: Lightning
Weakness: Piercing, Slash
Item 1: Tinned Spinach
Item 2: N/A
Rarity: 3 Stars
EXP: 130

Location: Wizardry Lab, Dark Chapel


26) Catoblepas
This ox-like beast's breath turns living things to stone.

Strength: Petrify
Weakness: Piercing, Slash
Item 1: Milk
Item 2: Meat Strip
Rarity: 2 Stars
EXP: 85

Location: Garden of Madness, Dark Chapel, Cursed Clock Tower


27) Ghoul
A foul being that rose from the grave to feed on corpses.

Strength: Dark
Weakness: Piercing, Slash, Fire, Holy, Petrify
Item 1: Rotten Meat
Item 2: Pendant
Rarity: 3 Stars
EXP: 10

Location: Garden of Madness, Silenced Ruin


28) Corpseweed
An Une that feeds off the nutrients of corpses.

Strength: Lightning
Weakness: Piercing, Slash
Item 1: N/A
Item 2: N/A
Rarity: 1 Star
EXP: 55

Location: Garden of Madness


29) Yeti
The notorious abominable snowman.

Strength: Water
Weakness: Fire, Petrify
Item 1: N/A
Item 2: N/A
Rarity: 1 Star
EXP: 200

Location: The Lost Village


30) Tombstone
Possessed by the grudges of the dead, it attacks all living things.

Strength: Piercing, Slash
Weakness: Blunt
Item 1: N/A
Item 2: N/A
Rarity: 3 Stars
EXP: 48

Location: Dark Chapel

Castlevania: Dawn of Sorrow

31) Ghost Dancer
The spirits of nobles that dance with great elegance.

Strength: Blunt, Piercing, Slash, Dark
Weakness: Holy
Item 1: Tea
Item 2: N/A
Rarity: 2 Stars
EXP: 53

Location: Dark Chapel, Demon Guest House


32) Flying Humanoid
A mysterious figure that hovers in the distance.

Strength: N/A
Weakness: N/A
Item 1: N/A
Item 2: N/A
Rarity: N/A
EXP: 1

Location: Cursed Clock Tower


33) Mini Devil
A little demon with a big heart.

Strength: Dark
Weakness: Holy
Item 1: N/A
Item 2: N/A
Rarity: 2 Stars
EXP: 66

Location: Dark Chapel


34) Quetzalcoatl
A reincarnation of the ancient snake god.

Strength: Piercing, Dark
Weakness: Blunt, Fire, Holy
Item 1: N/A
Item 2: Biker Jacket
Rarity: 2 Stars
EXP: 120

Location: Dark Chapel


35) Treant
An ancient tree animated by a purely malevolent will.

Strength: Lightning
Weakness: Slash, Fire
Item 1: N/A
Item 2: N/A
Rarity: 3 Stars
EXP: 150

Location: Garden of Madness


36) Amalaric Sniper
A fearsome archer and a fallen angel.

Strength: Holy
Weakness: Piercing, Slash, Dark
Item 1: N/A
Item 2: Chakram
Rarity: 2 Stars
EXP: 84

Location: Dark Chapel


37) Valkyrie
A female warrior with a pretty face and a wicked heart.

Strength: Holy
Weakness: Piercing, Slash, Dark, Poison
Item 1: Breastplate
Item 2: Pancake
Rarity: 3 Stars
EXP: 90

Location: Dark Chapel


38) Great Armor
A heavily armored knight built out of the corpses of powerful warriors.

Strength: Fire, Water
Weakness: Blunt, Lightning
Item 1: Ring Mail
Item 2: N/A
Rarity: 2 Stars
EXP: 180

Location: Dark Chapel


39) Killer Doll
A murderous doll that wanders about in search of living bodies.

Strength: Dark
Weakness: Fire, Holy, Petrify
Item 1: N/A
Item 2: N/A
Rarity: 3 Stars
EXP: 70

Location: Demon Guest House


40) Waiter Skeleton
A skeleton that inhabits the castle. Always carries around a pot of curry.

Strength: Piercing, Dark
Weakness: Blunt, Fire, Holy
Item 1: N/A
Item 2: Beef Curry
Rarity: 2 Stars
EXP: 60

Location: Demon Guest House, Silenced Ruin


41) Persephone
A demonic maid in the employ of an unearthly baron.

Strength: Dark
Weakness: Piercing, Slash, Holy, Poison
Item 1: Silk Robe
Item 2: Strawberry
Rarity: 2 Stars
EXP: 82

Location: Demon Guest House


42) Witch
A spell caster with the ability to cast a wide variety of spells.

Strength: Dark
Weakness: Piercing, Slash, Holy, Poison
Item 1: Mage Robe
Item 2: Cream Soda
Rarity: 2 Stars
EXP: 86

Location: Dark Chapel, Demon Guest House


43) Buer
A beast with many legs.

Strength: Fire, Water
Weakness: Piercing, Slash, Petrify
Item 1: N/A
Item 2: N/A
Rarity: 1 Star
EXP: 85

Location: Demon Guest House


44) Lilith
An alluring demon that deludes its victims with its mystifying beauty.

Strength: Dark
Weakness: Piercing, Slash, Holy, Poison
Item 1: Coffee
Item 2: N/A
Rarity: 2 Stars
EXP: 98

Location: Demon Guest House


45) Killer Clown
A creepy jester with murderous intent. Also a shrewd poker player.

Strength: N/A
Weakness: Piercing, Slash, Poison, Petrify
Item 1: Hamburger
Item 2: Three 7s
Rarity: 2 Stars
EXP: 160

Location: Demon Guest House

Castlevania: Dawn of Sorrow

46) Skelerang
A skeleton that expertly hurls boomerangs.

Strength: Piercing, Dark
Weakness: Blunt, Fire, Holy
Item 1: Boomerang
Item 2: N/A
Rarity: 2 Stars
EXP: 50

Location: The Lost Village, Garden of Madness, Demon Guest House, Silenced Ruin


47) Flea Man
A sinister little man that leaps about as if he were a flea.

Strength: N/A
Weakness: Piercing, Slash, Curse, Petrify
Item 1: Kung-Fu Suit
Item 2: N/A
Rarity: 2 Stars
EXP: 25

Location: Condemned Tower


48) Devil
Hell's keeper.

Strength: Dark
Weakness: Light
Item 1: Mind Up
Item 2: Skull Necklace
Rarity: 2 Stars
EXP: 178

Location: Demon Guest House, Cursed Clock Tower, Silenced Ruin


49) Guillotiner
Rumored to have chopped off thousands of heads with its bloody guillotine.

Strength: Dark
Weakness: Holy
Item 1: N/A
Item 2: N/A
Rarity: 1 Star
EXP: 134

Location: Dark Chapel, The Pinnacle


50) Draghignazzo
One of the guardians of the dungeons of hell. He is quite the pessimist.

Strength: Dark
Weakness: Piercing, Slash, Holy, Curse, Petrify
Item 1: Katana
Item 2: N/A
Rarity: 3 Stars
EXP: 113

Location: Condemned Tower


Previous | 1 | 2 | Next

Related Post

Related Posts Plugin for WordPress, Blogger...

Comments